# 发布Jar包到Maven中央仓库(为开发开源中间件做准备)
作者:小傅哥
博客:https://bugstack.cn (opens new window)
沉淀、分享、成长,让自己和他人都能有所收获!😄
# 前言介绍
(19年12月)最近想基于Spring Boot做个开源共享项目,开发一个分布式任务DcsSchedule中间件可以把Schedule增强。那么遇到一个问题希望把Jar包发包到Maven中央仓库,这样需要使用的用户就可以直接引入。
# 发布准备
| 内容 | 备注 | |
|---|---|---|
| 1 | 申请Github帐号: https://github.com | 用于上传开源代码:https://github.com/fuzhengwei/schedule-spring-boot-starter |
| 2 | GPG生成密钥工具: Windows:https://gpg4win.org/download.html Mac:https://gpgtools.org/ | 在后续流程中下载安装生成密钥并上传置服务器,本文使用的服务器是:hkp://keyserver.ubuntu.com:80 |
| 3 | 工单系统: https://issues.sonatype.org | 负责申请上传资格及完成第一次上传,后续更新不需要使用,相当于一个启动装置 |
| 4 | 构件仓库: https://oss.sonatype.org | 上传的jar包会先存放到这里,在这里进行 Release 后即可发布到maven中央仓库,也可以本地设置自动发布 |
| 5 | 镜像仓库: http://search.maven.org | 最终成功发布的jar可以在这里搜到 |
| 6 | Maven仓库:https://mvnrepository.com | 经过几个小时耐心的等待会在Maven仓库中搜到 |
| 7 | 阿里云仓库:https://maven.aliyun.com | 阿里云的仓库会同步的快一些 |
| 8 | 个人域名:https://bugstack.cn | 这里主要用于工单资格验证(Add a TXT record to your DNS referencing this JIRA ticket: OSSRH-53637 (Fastest)) |
# 跟着节奏
# 1. 下载安装Gpg生成密钥
我们需要一个GPG环境,用来对上传的文件进行加密和签名,保证你的jar包不被篡改
1991年,程序员Phil Zimmermann为了避开政府监视,开发了加密软件PGP。这个软件非常好用,迅速流传开来,成了许多程序员的必备工具。但是,它是商业软件,不能自由使用。所以,自由软件基金会决定,开发一个PGP的替代品,取名为GnuPG。这就是GPG的由来。
- 下载地址:https://gpg4win.org/download.html (opens new window)
- 下载完成后直接安装即可,比较傻瓜式安装很简单,记得选中文(如果你英文硬也可以不选)
- 生成密钥(可以使用命令行生成,也可以直接在操作界面生成)
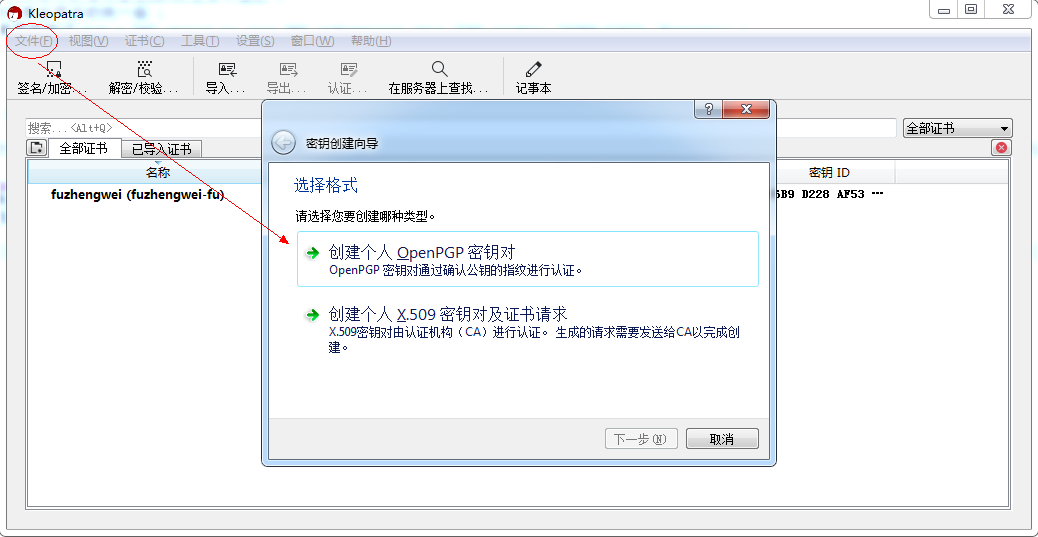
- 文件>新建密钥对(Ctrl+N) -- 创建个人 OpenPGP 密钥对
![]()
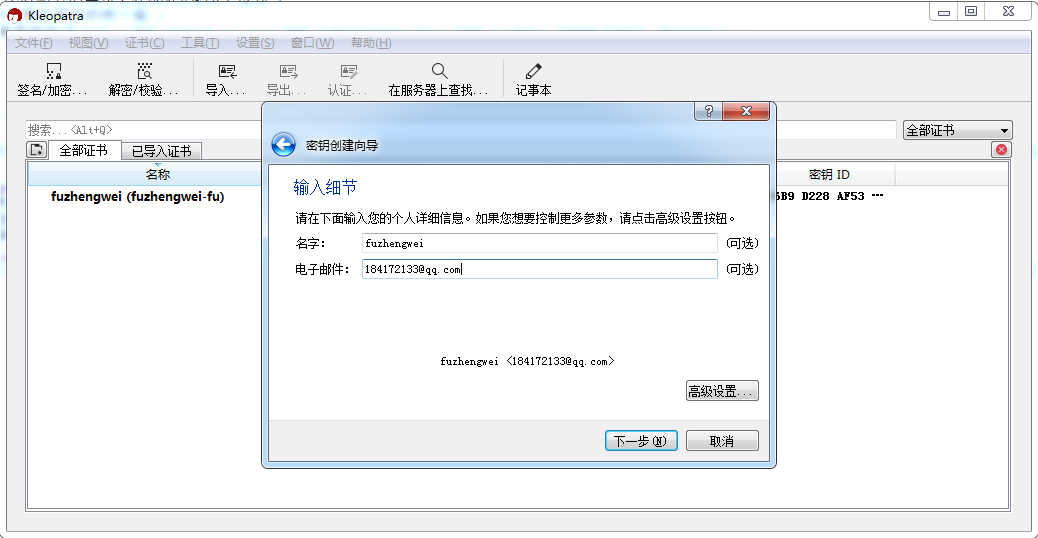
- 填写个人信息姓名和邮箱 并点击到 新建
![]()
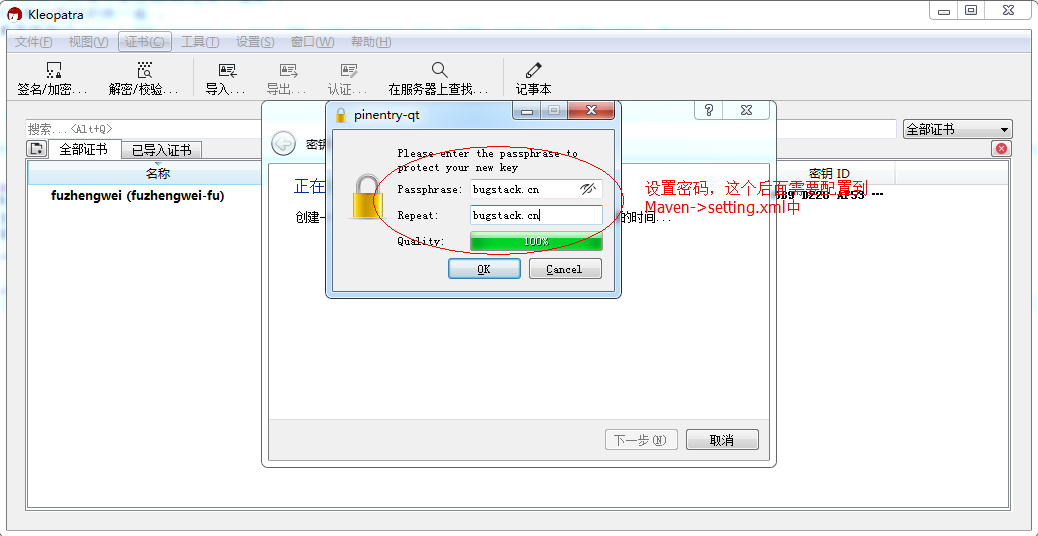
- 填写密钥密码
![]()
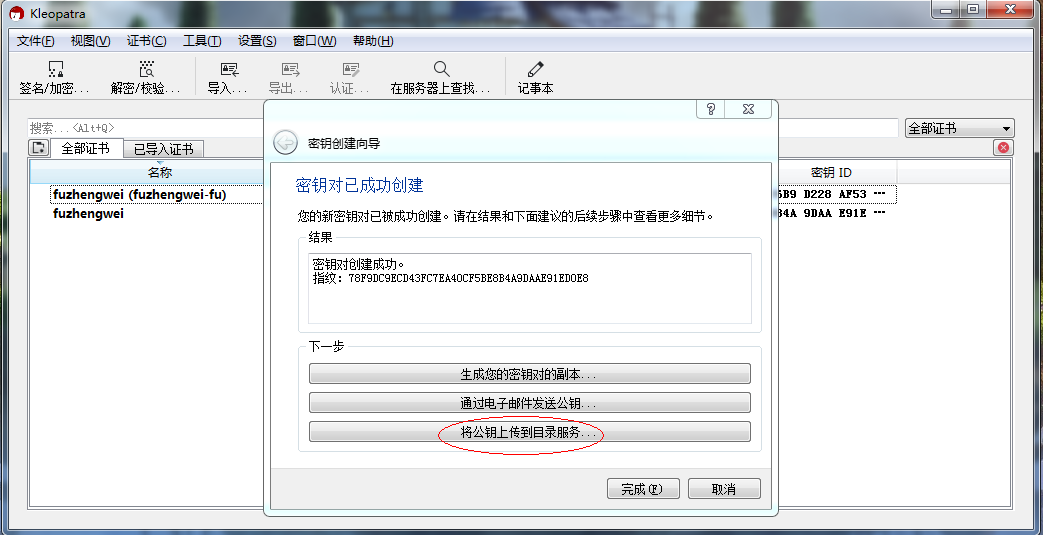
- 将公钥上传到目录服务{如果上传失败,则通过:设置(S)->配置Kleopatra(C),修改 OpenPGP密钥服务器为:hkp://keyserver.ubuntu.com:80}
![]()
- 文件>新建密钥对(Ctrl+N) -- 创建个人 OpenPGP 密钥对
# 2. 工单系统帐号注册issues.sonatype
# 1. 注册地址:https://issues.sonatype.org/secure/Signup!default.jspa
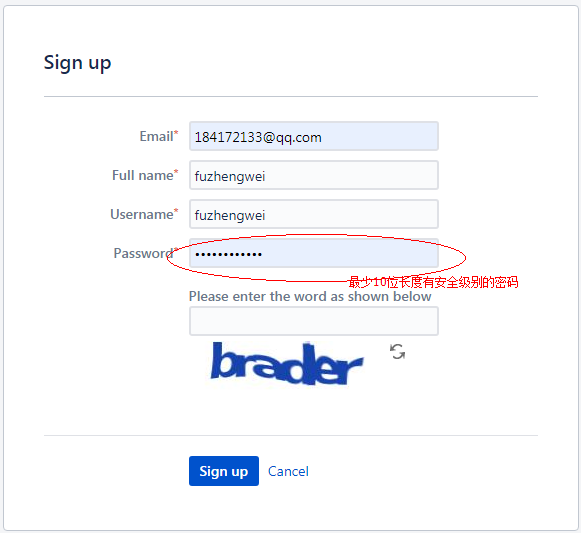
# 2. 创建工单
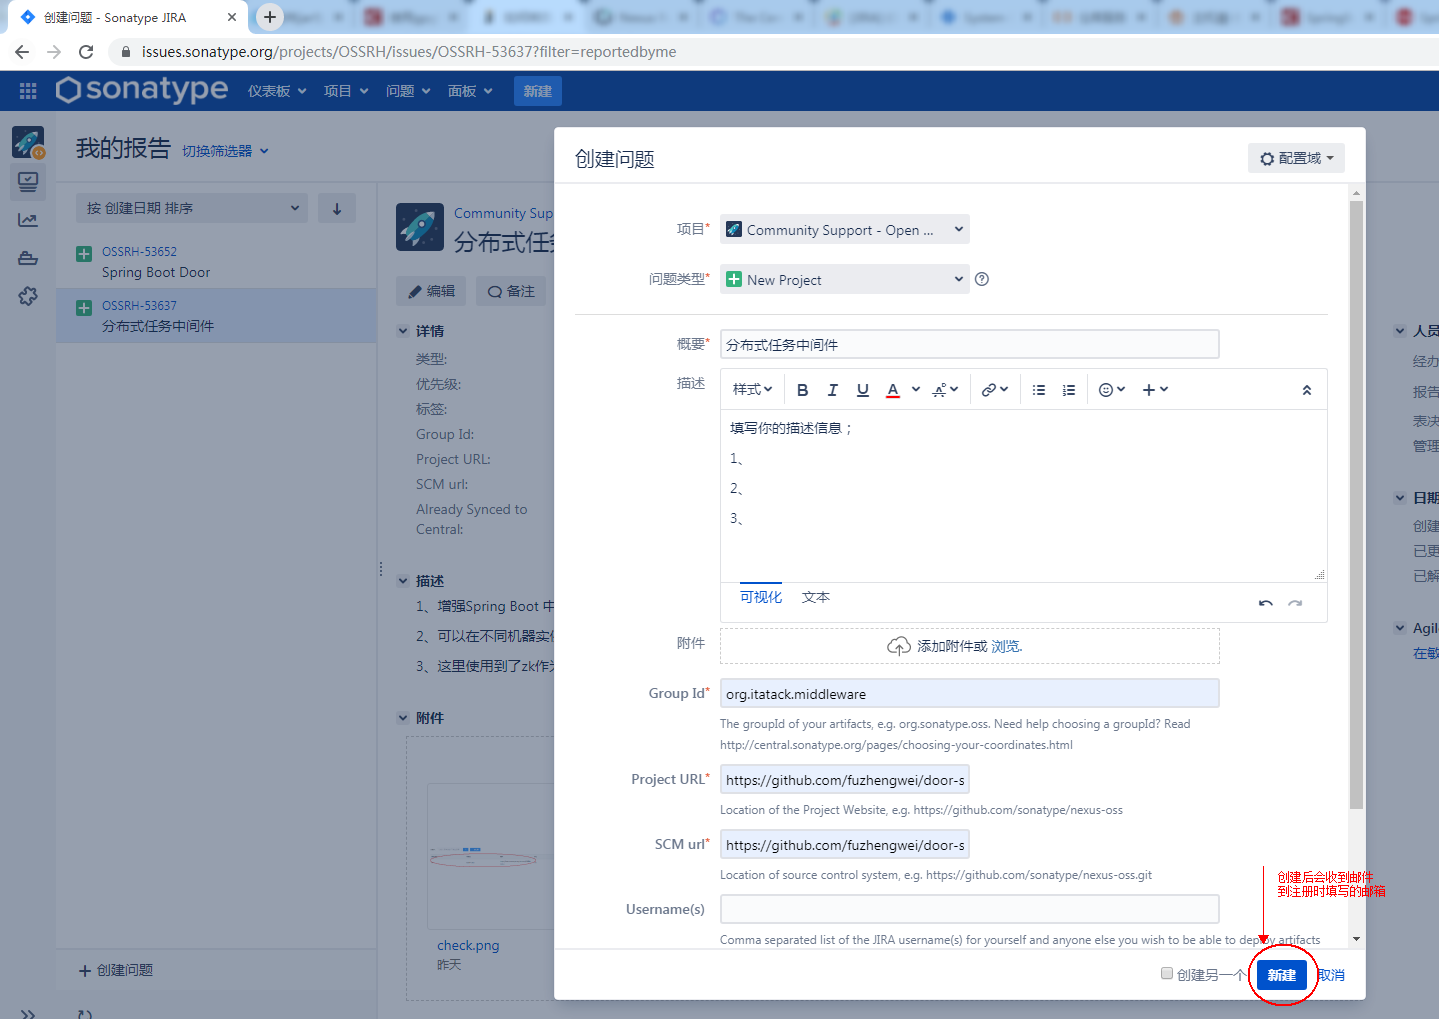
- 项目:Community Support - Open Source Project Repository Hosting
- 概要:发布Jar的名称
- 描述:非必填,最好描述清晰
- Group Id:org.itatack.middleware & 和你的域名有关系,因为后续需要使用域名验证
- Project URL:Github项目站点(https://github.com/fuzhengwei/door-spring-boot-starter)
- SCM url:源码仓库(https://github.com/fuzhengwei/door-spring-boot-starter.git)
# 3. 配合人工审核
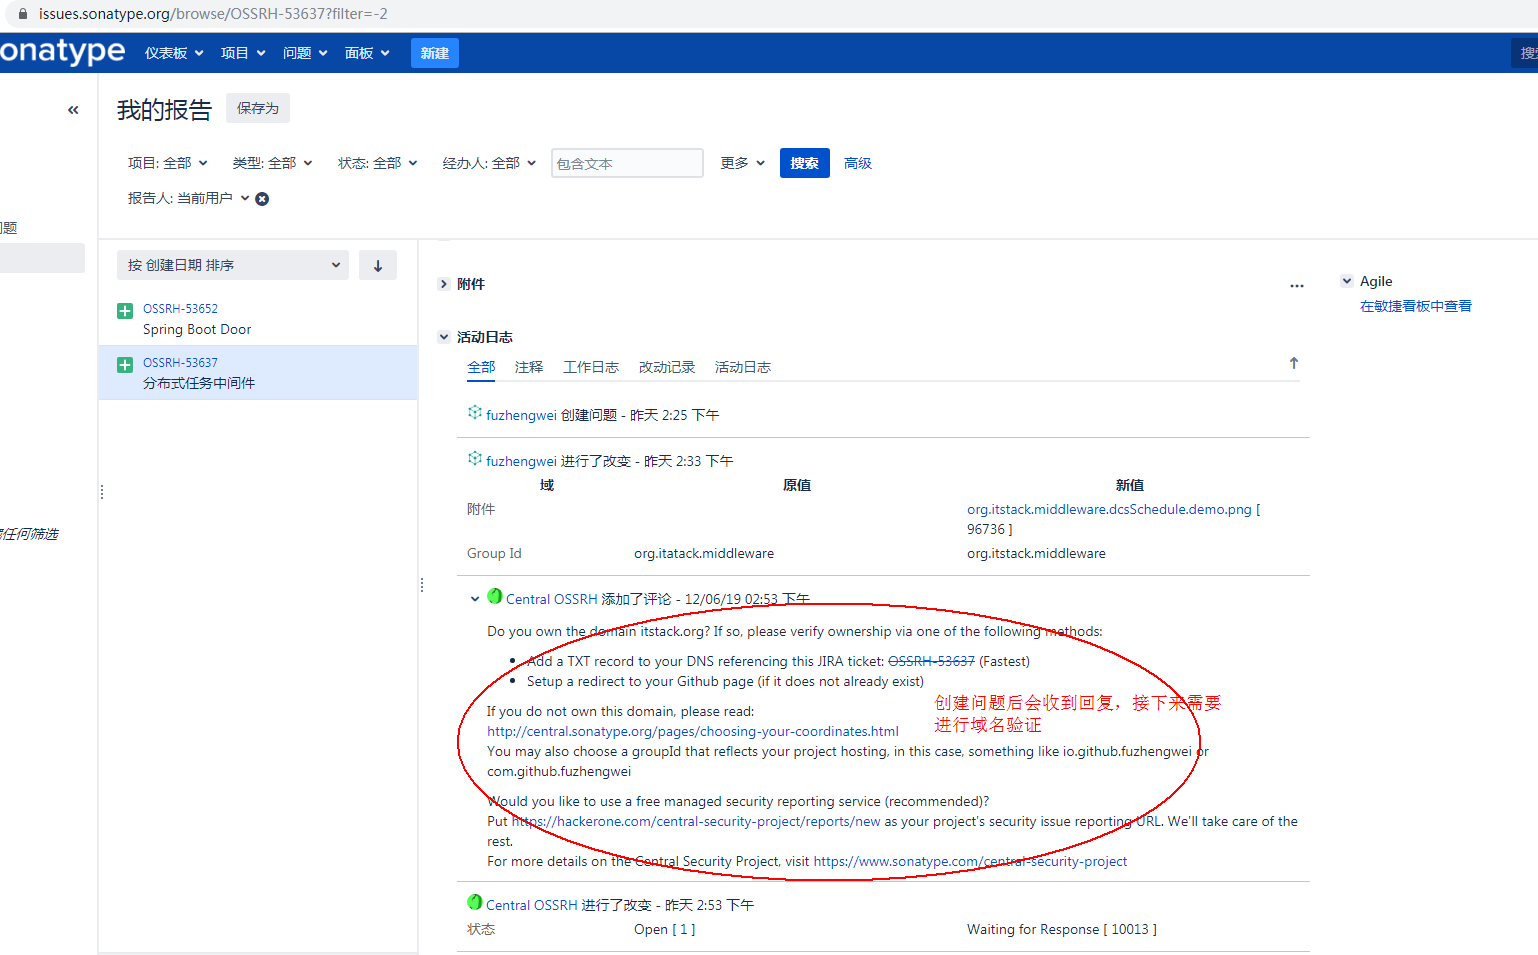
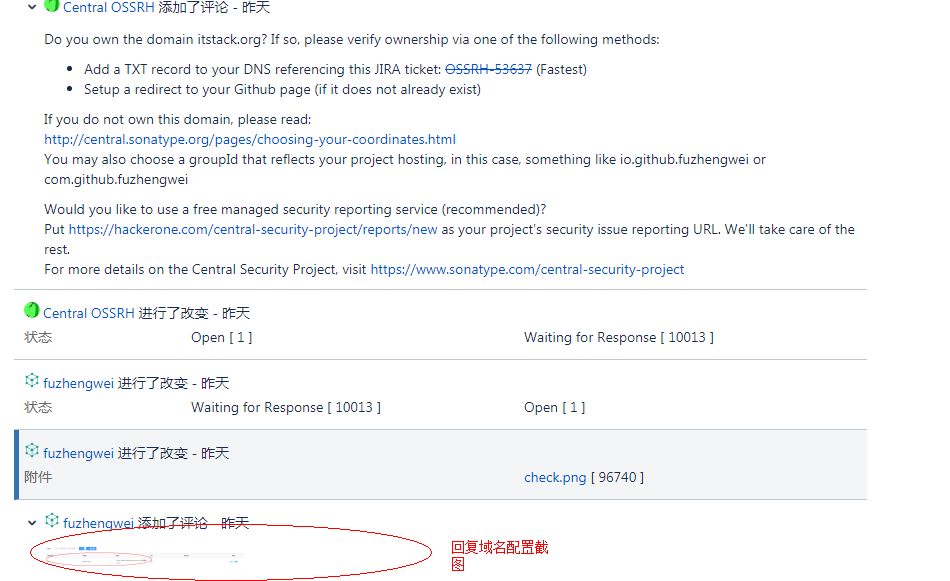
当创建完工单后,会收到信息反馈(国外与我们有时间差,半夜的时候他们审核的更快);
Do you own the domain itstack.org? If so, please verify ownership via one of the following methods:

Add a TXT record to your DNS referencing this JIRA ticket: OSSRH-53637 (Fastest)
Setup a redirect to your Github page (if it does not already exist)
If you do not own this domain, please read:
http://central.sonatype.org/pages/choosing-your-coordinates.html
You may also choose a groupId that reflects your project hosting, in this case, something like io.github.fuzhengwei or com.github.fuzhengwei

Would you like to use a free managed security reporting service (recommended)?
Put https://hackerone.com/central-security-project/reports/new as your project's security issue reporting URL. We'll take care of the rest.
For more details on the Central Security Project, visit https://www.sonatype.com/central-security-project
1
2
3
4
5
6
7
8
9
10
11![]()
配置域名验证签名;TXT 指向问题域:https://issues.sonatype.org/browse/OSSRH-53637
![]()
在域名验证截图,回复到问题下,人工审核会进行验证处理
![]()
验证成功后,会收到邮件回复,也可以在issues看到{意思就说去发布你的Jar吧宝贝,发布完告诉我一下(来这里回复下,我就让你用了)}
 org.itstack.middleware has been prepared, now user(s) fuzhengwei can:
 * Deploy snapshot artifacts into repository https://oss.sonatype.org/content/repositories/snapshots
 * Deploy release artifacts into the staging repository https://oss.sonatype.org/service/local/staging/deploy/maven2
 * Release staged artifacts into repository 'Releases'

 please comment on this ticket when you promoted your first release, thanks
1
2
3
4
5
6接下来等待发布Jar包成功后,到这里回复并收到反馈,如下(证明你成功了!);
Central sync is activated for org.itstack.middleware. After you successfully release, your component will be published to Central, typically within 10 minutes, though updates to search.maven.org can take up to two hours.1![]()


# 3. 配置Maven Settings.xml
# 1. Maven Settings.xml 配置,在servers中添加;
<server>
	<id>sonatype-nexus-snapshots</id>
	<username>https://issues.sonatype.org的账号</username>
	<password>https://issues.sonatype.org的密码</password>
</server>
<server>
	<id>sonatype-nexus-staging</id>
	<username>https://issues.sonatype.org的账号</username>
	<password>https://issues.sonatype.org的密码</password>
</server>
<server>
	<id>ossrh</id>
	<username>https://issues.sonatype.org的账号</username>
	<password>https://issues.sonatype.org的密码</password>
</server>
1
2
3
4
5
6
7
8
9
10
11
12
13
14
15
2
3
4
5
6
7
8
9
10
11
12
13
14
15
# 2. 为了更快的加载Jar,在mirrors中配置了阿里云仓库;
<mirror>
  <id>alimavenrepository</id>
  <name>aliyun maven repository</name>
  <url>http://maven.aliyun.com/nexus/content/groups/public/</url>
  <mirrorOf>central</mirrorOf>
</mirror>
1
2
3
4
5
6
2
3
4
5
6
# 3. 密钥配置,在profile中添加ossrh
<profile>
	<id>ossrh</id>
	<activation>
		<activeByDefault>true</activeByDefault>
	</activation>
	<properties>
		<gpg.executable>D:/Program Files (x86)/GnuPG/bin/gpg.exe</gpg.executable>
		<gpg.passphrase>上面生成的密钥密码:bugstack.cn</gpg.passphrase>
		<gpg.homedir>{找到dir:cmd->gpg --list-key}C:/Users/fuzhengwei/AppData/Roaming/gnupg</gpg.homedir>
	</properties>
</profile>
1
2
3
4
5
6
7
8
9
10
11
2
3
4
5
6
7
8
9
10
11
# 4. 配置POM文件
# 1. 在pom文件里添加scm、licenses、developers、distributionManagement
 <licenses>
	<license>
		<name>The Apache Software License, Version 2.0</name>
		<url>http://www.apache.org/licenses/LICENSE-2.0.txt</url>
		<distribution>repo</distribution>
	</license>
</licenses>

<scm>
	<url>https://github.com/fuzhengwei/schedule-spring-boot-starter</url>
	<connection>https://github.com/fuzhengwei/schedule-spring-boot-starter.git</connection>
	<developerConnection>https://github.com/fuzhengwei/schedule-spring-boot-starter</developerConnection>
</scm>

<developers>
	<developer>
		<name>fuzhengwei</name>
		<email>184172133@qq.com</email>
		<url>https://github.com/fuzhengwei/schedule-spring-boot-starter</url>
	</developer>
</developers>

<distributionManagement>
	<snapshotRepository>
		<id>ossrh</id>
		<url>https://oss.sonatype.org/content/repositories/snapshots</url>
	</snapshotRepository>
</distributionManagement>
1
2
3
4
5
6
7
8
9
10
11
12
13
14
15
16
17
18
19
20
21
22
23
24
25
26
27
28
2
3
4
5
6
7
8
9
10
11
12
13
14
15
16
17
18
19
20
21
22
23
24
25
26
27
28
# 2. 配置编译发布信息build,gpg相关插件
- maven-source-plugin 用来生成Source Jar文件
- maven-javadoc-plugin 用来生成 javadoc 文档
- maven-gpg-plugin 用来对工程文件进行自动签名
- nexus-staging-maven-plugin 用来将工程发布到中央仓库,另外注意生成javadoc文档时需要指定关闭doclint,不然可能因为使用了不规范的javadoc注解而导致失败,完整配置如下
<!-- 发布Jar到Maven仓库 Begin -->
<!--生成Source jar文件-->
<plugin>
	<groupId>org.apache.maven.plugins</groupId>
	<artifactId>maven-source-plugin</artifactId>
	<version>2.2.1</version>
	<executions>
		<execution>
			<id>attach-sources</id>
			<goals>
				<goal>jar-no-fork</goal>
			</goals>
		</execution>
	</executions>
</plugin>
<!--生成Javadoc,关闭doclint,避免注解检查不通过-->
<plugin>
	<groupId>org.apache.maven.plugins</groupId>
	<artifactId>maven-javadoc-plugin</artifactId>
	<version>2.9.1</version>
	<executions>
		<execution>
			<id>attach-javadocs</id>
			<goals>
				<goal>jar</goal>
			</goals>
			<configuration>
				<additionalparam>-Xdoclint:none</additionalparam>
                <!-- /usr/libexec/java_home -V -->
                <javadocExecutable>/Library/Java/JavaVirtualMachines/jdk1.8.0_311.jdk/Contents/Home/bin/javadoc</javadocExecutable>
			</configuration>
		</execution>
	</executions>
</plugin>
<!--Maven GPG插件用于使用以下配置对组件进行签名-->
<plugin>
	<groupId>org.apache.maven.plugins</groupId>
	<artifactId>maven-gpg-plugin</artifactId>
	<version>1.5</version>
	<executions>
		<execution>
			<id>sign-artifacts</id>
			<phase>verify</phase>
			<goals>
				<goal>sign</goal>
			</goals>
		</execution>
	</executions>
</plugin>
<!--Nexus Staging Maven插件是将组件部署到OSSRH并将其发布到Central Repository的推荐方法-->
<plugin>
	<groupId>org.sonatype.plugins</groupId>
	<artifactId>nexus-staging-maven-plugin</artifactId>
	<version>1.6.7</version>
	<extensions>true</extensions>
	<configuration>
		<serverId>ossrh</serverId>
		<nexusUrl>https://oss.sonatype.org/</nexusUrl>
		<autoReleaseAfterClose>true</autoReleaseAfterClose>
	</configuration>
</plugin>
<!-- release plugin,用于发布到release仓库部署插件 -->
<plugin>
	<groupId>org.apache.maven.plugins</groupId>
	<artifactId>maven-release-plugin</artifactId>
	<version>2.4.2</version>
</plugin>
<!-- 发布Jar到Maven仓库 End -->
1
2
3
4
5
6
7
8
9
10
11
12
13
14
15
16
17
18
19
20
21
22
23
24
25
26
27
28
29
30
31
32
33
34
35
36
37
38
39
40
41
42
43
44
45
46
47
48
49
50
51
52
53
54
55
56
57
58
59
60
61
62
63
64
65
66
67
68
2
3
4
5
6
7
8
9
10
11
12
13
14
15
16
17
18
19
20
21
22
23
24
25
26
27
28
29
30
31
32
33
34
35
36
37
38
39
40
41
42
43
44
45
46
47
48
49
50
51
52
53
54
55
56
57
58
59
60
61
62
63
64
65
66
67
68
# 4. 执行发布;Idea Maven -> Lifecycle -> Deploy
- 接下来开发发布Jar包,中间会提示输入密钥生成时候的密码
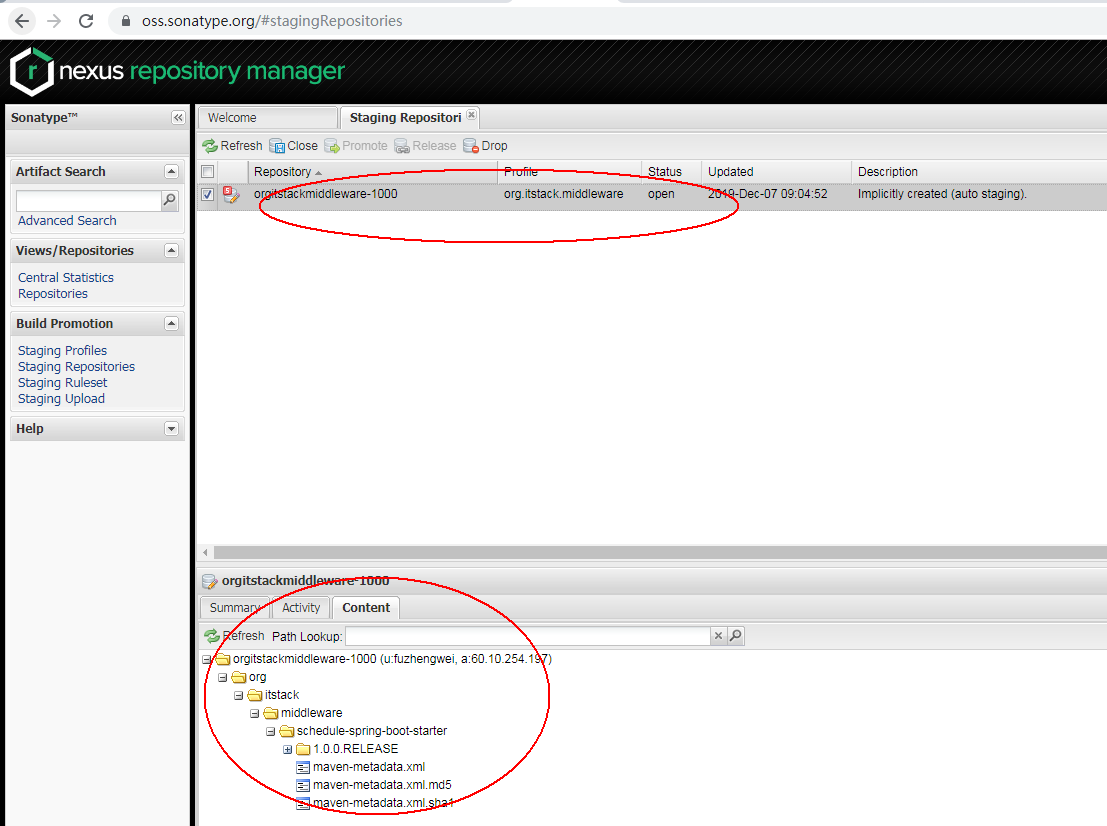
- https://oss.sonatype.org 查看发布内容
![]()
- 到上面"配合人工审核",按照说明提交发布成功信息,验证成功后会收到回复,如下;
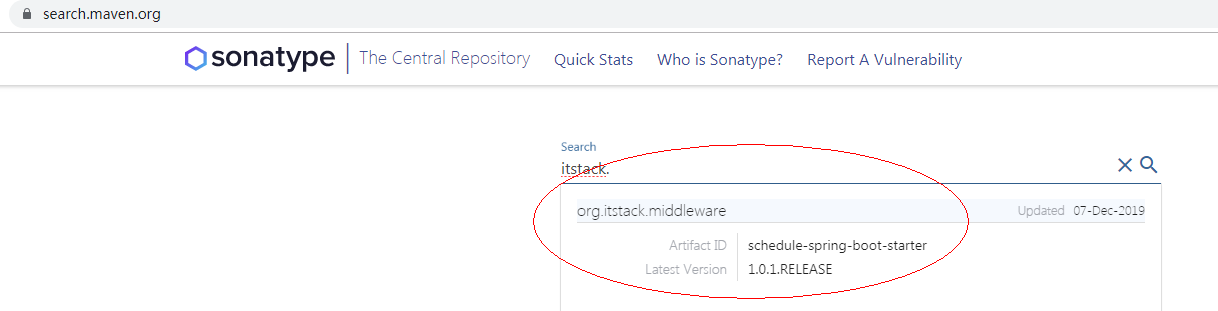
Central sync is activated for org.itstack.middleware. After you successfully release, your component will be published to Central, typically within 10 minutes, though updates to search.maven.org can take up to two hours.1 - https://search.maven.org 搜索版本信息
![]()
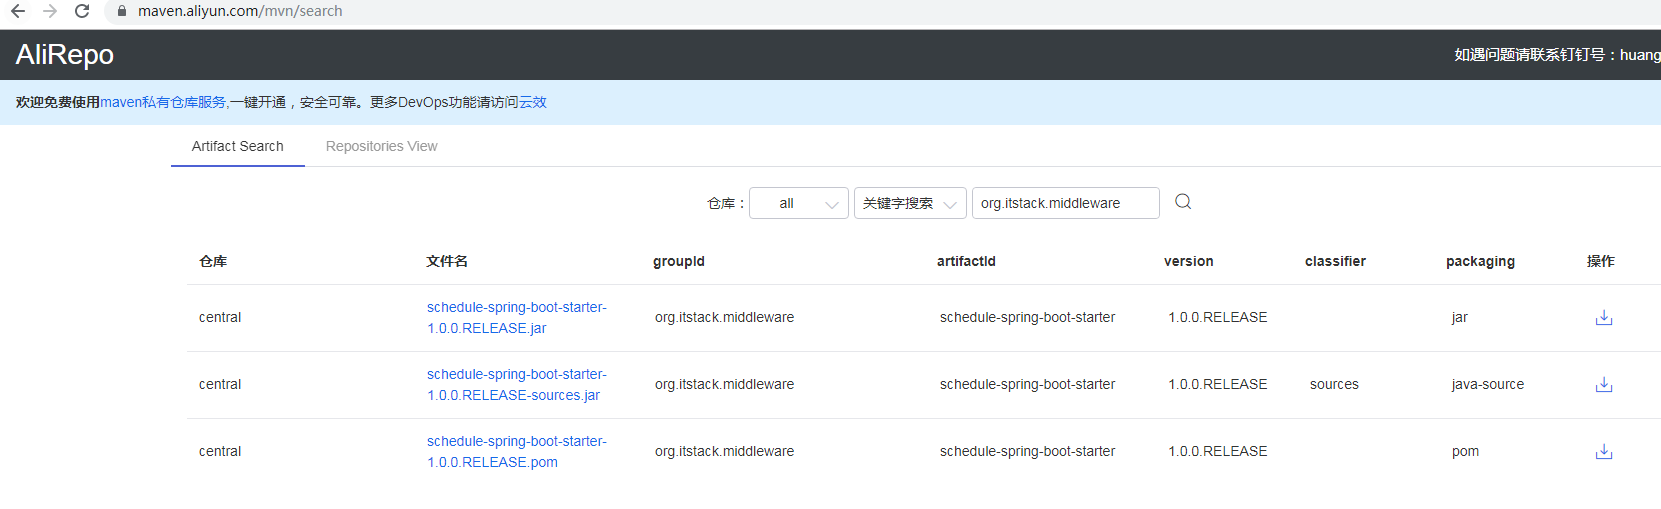
- https://maven.aliyun.com 阿里云仓库同步较快,可以查看
![]()
# 综上总结
- 整体流程还是很长的,如果第一次尝试去弄,嗯,你可能有一个不眠夜
- 中间可能会遇到各种异常错误,包括密钥、打包、发版等等,注意仔细阅读本文细节以及自己多次尝试,总归是会成功的
- 比较常识性的问题;同一个RELEASE版本只能上传一次否则会失败、老外真的是半夜回复比较快因为咱们半夜他们正好天亮了
23年12月3日,看到2个不错的同类教程。如果有推送失败的,也可以参考;
京ICP备19031103号 | 
京公网安备 11030102010881号
| GPL Licensed | Copyright © 2019 小傅哥,All rights reserved.