# 20年3月27日,Github被攻击。我的GitPage博客也挂了,紧急修复之路,也教会你搭建 Jekyll 博客!
作者:小傅哥
博客:https://bugstack.cn (opens new window)
原文:https://mp.weixin.qq.com/s/ISA7Nmow-boP1yWStGCuBw (opens new window)
# 一、前言
万万没想到!Github 竟然受到攻击了!还能让我使用了 GitPage 的博客瘫痪了!
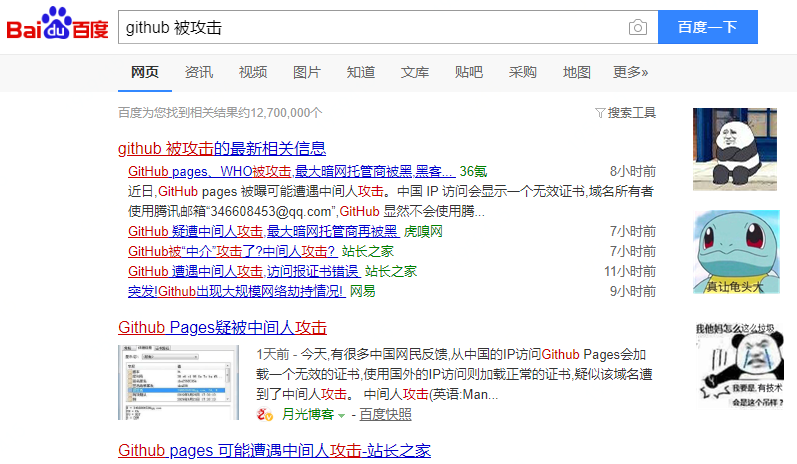
整个网站一下不能访问了,还是有点慌的,毕竟在这之前没有考虑到还能有这事。但虽然没有一个准备好了的预案,但也还是可以使用自己技术把这事搞定,尽快恢复。为了可以尽快恢复博客的访问,我把网站迁移到了 码云 的Gitpage服务,并开启免费一个月使用(挺香),并迅速搞定配置以及 HTTPS。嗯!迁移过来速度还比之前快了。但是后来发现有些网络环境下竟然不能访问,这又让我感觉不爽了,否则我都快要交钱给 码云 (一年90元)。到 码云 官网群问使用这个搭建博客,百度收录吗?也没有人回应。如果不收录我没必要用了就,是吧。钱花了,事没办! 不过也还好有 Gitee,否则网站不能那么快恢复,如果按照下面的方式搞,至少 24 小时才能完事。
接下来就是将网站迁移到我自己买的服务器上,虽然过程比较坎坷,但终究还是满足了我的需求。提升了网站速度、体验,也可以让网站被百度爬虫收录。如果也有小伙伴遇到这样问题或者想建博客,可以按照我下面的步骤,进行安装 Jekyll 部署博客。
# 二、版本
Ruby,一种简单快捷的面向对象(面向对象程序设计)脚本语言,在20世纪90年代由日本人松本行弘(Yukihiro Matsumoto)开发,遵守GPL协议和Ruby License。它的灵感与特性来自于 Perl、Smalltalk、Eiffel、Ada以及 Lisp 语言。由 Ruby 语言本身还发展出了JRuby(Java平台)、IronRuby(.NET平台)等其他平台的 Ruby 语言替代品。Ruby的作者于1993年2月24日开始编写Ruby,直至1995年12月才正式公开发布于fj(新闻组)。因为Perl发音与6月诞生石pearl(珍珠)相同,因此Ruby以7月诞生石ruby(红宝石)命名。
| 序号 | 官网 | 描述 |
|---|---|---|
| 1 | https://rubyinstaller.org/downloads/ (opens new window) | Ruby官网下载 |
| 2 | https://gems.ruby-china.com/ (opens new window) | 完整 RubyGems 镜像China |
| 3 | http://www.ruby-lang.org/zh_cn/documentation/ (opens new window) | Ruby 编程文档 |
| 4 | http://jekyllthemes.org/ (opens new window) | jekyll 模版 |
| 5 | https://www.jekyll.com.cn/docs/ (opens new window) | 快速入门手册 |
Ruby 的版本比较多,安装方式也分为整体安装和分开安装(Ruby + devkit),而这些也是最容易出错的地方。有时候安装完了和自己的不博客版本对不上,而导致报错不能编译。目前经过测试此版本Ruby+Devkit 2.5.7-1 (x64)比较适合 Jekyll 博客的编译部署。如果你在官网下载速度较慢,可以添加公众号:bugstack虫洞栈,回复邮箱。
# 三、安装
Ruby+Devkit 2.5.7-1,完整包的安装过程比较简单,但需要注意以下几点;
- 安装路径不要有空格,中文等特殊符号
- 安装中的选项内容按照下图执行
- 安装完后需要更换数据源,这些内容会在下文具体执行总展示
# 1. 双击打开软件(rubyinstaller-devkit-2.5.7-1-x64)

# 2. 设置路径和选项

- 注意!千万不要把路径设置有空格、中文、特殊符号
- 注意!前两个是必选项,第三个可以不选
# 3. 继续执行直到完成
点击下一步即可,不需要更改配置

初步安装成功,点击
Finsh

按照到这我们的软件就已经安装完成了,此时你已经可以执行命令查看版本了。
Microsoft Windows [版本 6.1.7601]
版权所有 (c) 2009 Microsoft Corporation。保留所有权利。

C:\Users\xiaofuge>ruby -v
ruby 2.5.7p206 (2019-10-01 revision 67816) [x64-mingw32]
2
3
4
5
# 四、配置
在安装完成之后还需要执行一系列配置,才能让软件正常工作。并且不注意英文提示的小伙伴,可能你的一个回车就把刚安装好的软件卸载了!
# 1. 更换源
更新
Gem
C:\Users\xiaofuge>gem update --system
Updating rubygems-update
Fetching: rubygems-update-2.7.7.gem (100%)
Successfully installed rubygems-update-2.7.7
...
2
3
4
5
查看版本
C:\Users\xiaofuge>gem -v
2.7.7
2
替换源,否则你会下载的很慢
C:\Users\xiaofuge>gem sources --add https://gems.ruby-china.com/ --remove http
s://rubygems.org/
source https://gems.ruby-china.com/ already present in the cache
source https://rubygems.org/ not present in cache
2
3
4
查看新的源
C:\Users\xiaofuge>gem sources -l
*** CURRENT SOURCES ***

https://gems.ruby-china.com
2
3
4
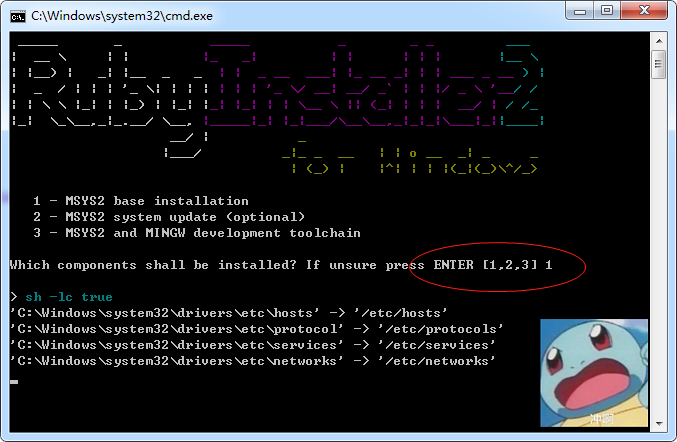
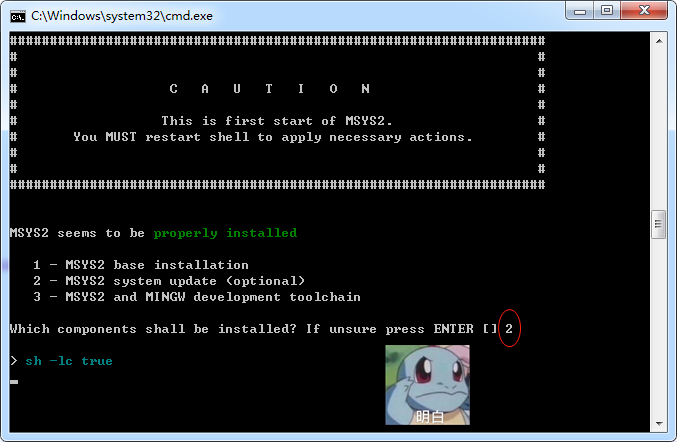
# 2. 基础的安装和配置
接下来的步骤就比较简单了,但整体的过程比较耗时,黑窗口会在我们执行命令后下载大约 600M 的软件。
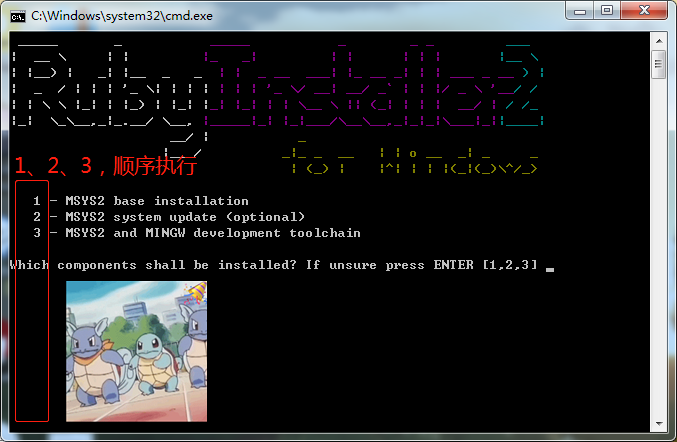
命令 1
命令 2
命令 3

好!当你顺利安装到此后,你的软件就已经安装完成,可以使用了!
# 五、安装Jekyll
Ruby 软件已经安装完成,接下来就是我们的博客的相关内容的安装了。
检查版本并安装
E:\>gem -v
2.7.7

E:\>gem install jekyll
Fetching: public_suffix-4.0.3.gem (100%)
Successfully installed public_suffix-4.0.3
Fetching: addressable-2.7.0.gem (100%)
Successfully installed addressable-2.7.0
Fetching: colorator-1.1.0.gem (100%)
Successfully installed colorator-1.1.0
...
ass-converter, rb-fsevent, rb-inotify, listen, jekyll-watch, kramdown, kramdown-
parser-gfm, liquid, mercenary, forwardable-extended, pathutil, rouge, safe_yaml,
 unicode-display_width, terminal-table, jekyll after 33 seconds
26 gems installed
2
3
4
5
6
7
8
9
10
11
12
13
14
15
查看安装的Jekyll版本
E:\>jekyll -v
jekyll 4.0.0
2
# 六、创建博客
Jekyll 给我们提供了创建博客的命令,你只需要选择好自己文件夹地址,进入执行即可。
# 1. 进入本地站点
C:\Users\xiaofuge>E:

E:\>cd E:\itstack
2
3
# 2. 创建博客
E:\>jekyll new myblog
Running bundle install in E:/myblog...
  Bundler: Fetching source index from https://rubygems.org/
  Bundler: Resolving dependencies.............
  Bundler: Using public_suffix 4.0.3
  Bundler: Using addressable 2.7.0
  ...
  New jekyll site installed in E:/myblog.
E:\>cd myblog
2
3
4
5
6
7
8
9
# 3. 编译博客
这里执行的编译是默认本地编译,也就是编译后文中都是 localhost:4000 地址开头,不要把这回内容传到服务端。
E:\myblog>jekyll build
Configuration file: E:/myblog/_config.yml
            Source: E:/myblog
       Destination: E:/myblog/_site
 Incremental build: disabled. Enable with --incremental
      Generating...
       Jekyll Feed: Generating feed for posts
                    done in 1.184 seconds.
 Auto-regeneration: disabled. Use --watch to enable.
2
3
4
5
6
7
8
9
- 编译好后看到一个
_site的文件夹,这里就是我们的静态博客内容。
# 4. 运行预览
如果在本地我们没编译而是执行运行预览也是可以的,他会自动进行编译。
E:\myblog>jekyll s
Configuration file: E:/myblog/_config.yml
            Source: E:/myblog
       Destination: E:/myblog/_site
 Incremental build: disabled. Enable with --incremental
      Generating...
       Jekyll Feed: Generating feed for posts
                    done in 0.847 seconds.
 Auto-regeneration: enabled for 'E:/myblog'
    Server address: http://127.0.0.1:4000/
  Server running... press ctrl-c to stop.
2
3
4
5
6
7
8
9
10
11
- 这里可以指定端口和IP,也可以控制后台运行,具体可以看到
十、助记指令
# 5. 运行效果
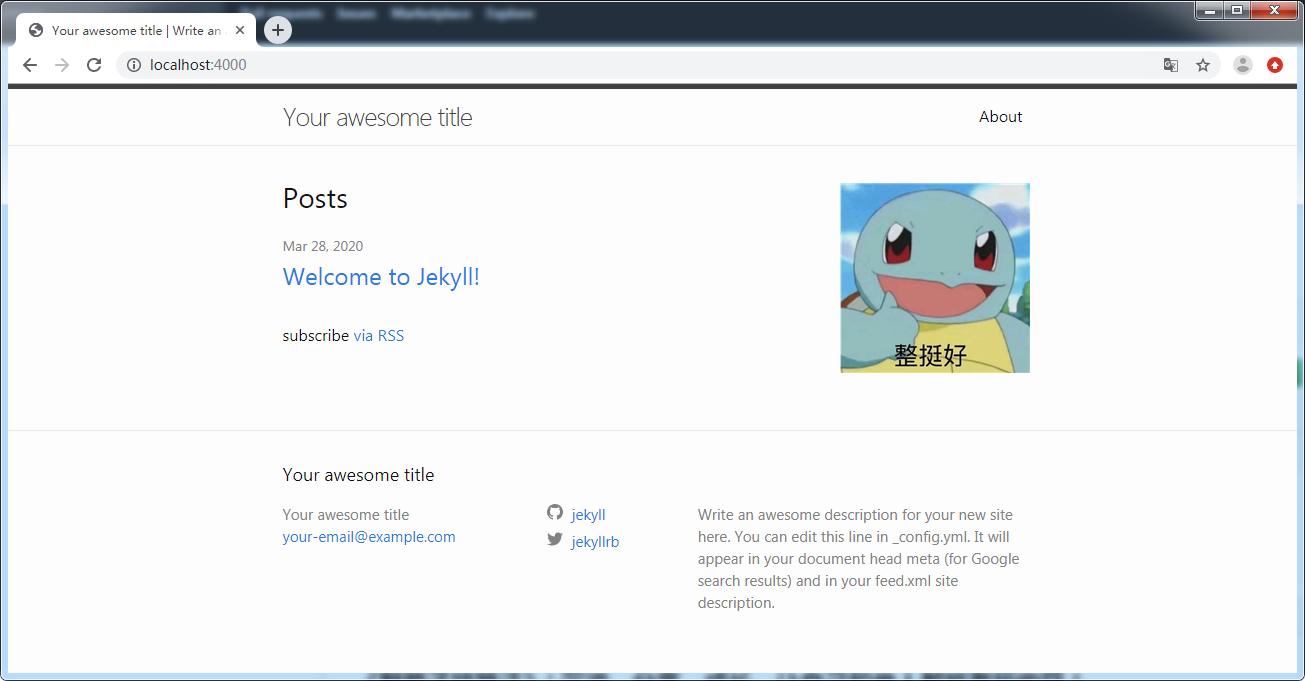
- 具体如何使用Jekyll编写博客,可以参考官网文档
博客结构
├── _config.yml
├── _includes
|   ├── footer.html
|   └── header.html
├── _layouts
|   ├── default.html
|   ├── post.html
|   └── page.html
├── _posts
|   └── 2020-03-28-welcome-to-jekyll.markdown
├── _sass
|   ├── _base.scss
|   ├── _layout.scss
|   └── _syntax-highlighting.scss
├── about.md
├── css
|   └── main.scss
├── feed.xml
└── index.html
2
3
4
5
6
7
8
9
10
11
12
13
14
15
16
17
18
19
# 七、克隆博客(使用模版)
好!接下来就是我们的重点内容了,虽然默认模版也不难看,但终究不是我们的博客。在这里我的目标是将个人博客进行本地编译运行。如果你有喜欢的模版或者是官网,或者是别人个Github,可以下载到自己本地。
# 1. 下载bundler
E:\itstack\gitee.com\fuzhengwei.github.io>gem install bundler
Fetching: bundler-2.1.4.gem (100%)
bundler's executable "bundle" conflicts with D:/Ruby25-x64/bin/bundle
Overwrite the executable? [yN]  n
ERROR:  Error installing bundler:
        "bundle" from bundler conflicts with D:/Ruby25-x64/bin/bundle
2
3
4
5
6
# 2. 安装环境
E:\itstack\gitee.com\fuzhengwei.github.io>bundle install
Fetching gem metadata from http://gems.ruby-china.com/..........
Using rake 12.3.0
Fetching concurrent-ruby 1.0.5
Installing concurrent-ruby 1.0.5
Fetching i18n 0.9.1
Installing i18n 0.9.1
Using minitest 5.10.3
Using thread_safe 0.3.6
Fetching tzinfo 1.2.4
Installing tzinfo 1.2.4
Fetching activesupport 4.2.10
...
lockfile (nokogiri (~> 1.6)).
Either installing with `--full-index` or running `bundle update
2
3
4
5
6
7
8
9
10
11
12
13
14
15
# 3. 更新bundle(按需执行)
E:\itstack\gitee.com\fuzhengwei.github.io>bundle update
Fetching gem metadata from http://gems.ruby-china.com/...........
Fetching gem metadata from http://gems.ruby-china.com/.
Resolving dependencies....
Fetching rake 13.0.1 (was 12.3.0)
...
2
3
4
5
6
# 4. 编译
bundle exec jekyll build

# 5. 运行
bundle exec jekyll s
http://localhost:4000/
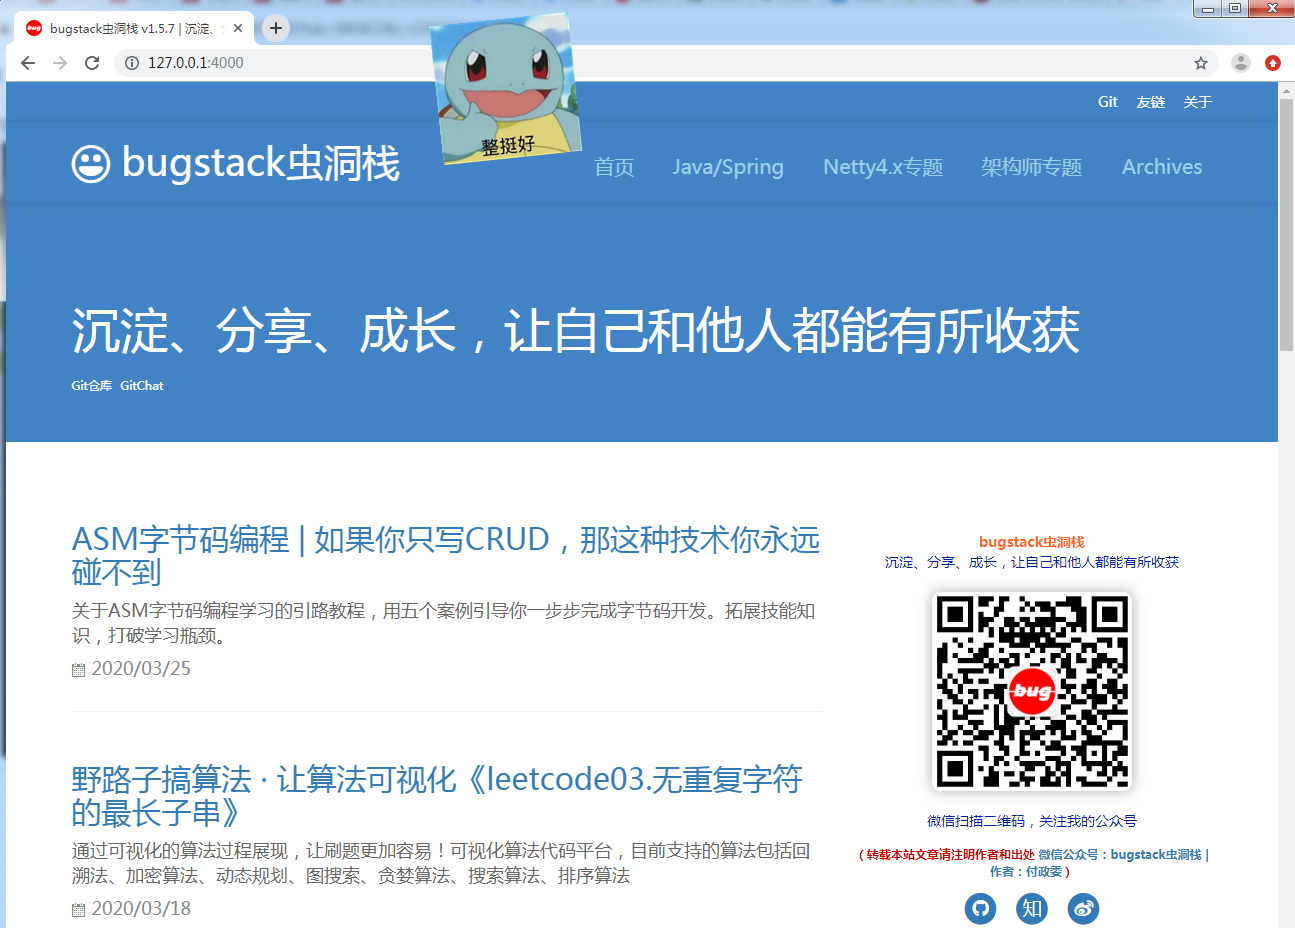
- 可以看到我们已经很顺利的运行并访问了博客,效果还不错。
- 这会虽然是本地运行,所以里面的链接都是
http://localhost:4000/,不能用于服务端部署。
# 八、手动发布
如果部署到服务端,那么我们编译后里面的链接地址都肯定以我们的域名开始,例如;https://bugstack.cn/。接下来我们开始执行服务端部署的编译和使用。
# 1. 清空和重新构建
Microsoft Windows [版本 6.1.7601]
版权所有 (c) 2009 Microsoft Corporation。保留所有权利。

C:\Users\fuzhengwei>E:

E:\>cd E:\itstack\gitee.com\fuzhengwei.github.io

E:\itstack\gitee.com\fuzhengwei.github.io>bundle exec jekyll clean
Configuration file: E:/itstack/gitee.com/fuzhengwei.github.io/_config.yml
           Cleaner: Removing ./_site...
           Cleaner: Nothing to do for ./.jekyll-metadata.
           Cleaner: Removing ./.jekyll-cache...
           Cleaner: Nothing to do for .sass-cache.

E:\itstack\gitee.com\fuzhengwei.github.io>bundle exec jekyll build
Configuration file: E:/itstack/gitee.com/fuzhengwei.github.io/_config.yml
            Source: E:/itstack/gitee.com/fuzhengwei.github.io
       Destination: E:/itstack/gitee.com/fuzhengwei.github.io/_site
 Incremental build: disabled. Enable with --incremental
      Generating...
   GitHub Metadata: No GitHub API authentication could be found. Some fields may
 be missing or have incorrect data.
                    done in 18.102 seconds.
 Auto-regeneration: disabled. Use --watch to enable.

E:\itstack\gitee.com\fuzhengwei.github.io>
2
3
4
5
6
7
8
9
10
11
12
13
14
15
16
17
18
19
20
21
22
23
24
25
26
- 在以上我们分别执行了清空(
bundle exec jekyll clean)和构建(bundle exec jekyll build),接下来看以看到文件下的_site内容的生成。
# 2. 部署到远程服务器
远程服务器的部署主要依赖于大家个子使用的服务器类型,我的手里有一台云虚拟机,通过FTP的方式进行部署即可。如下;
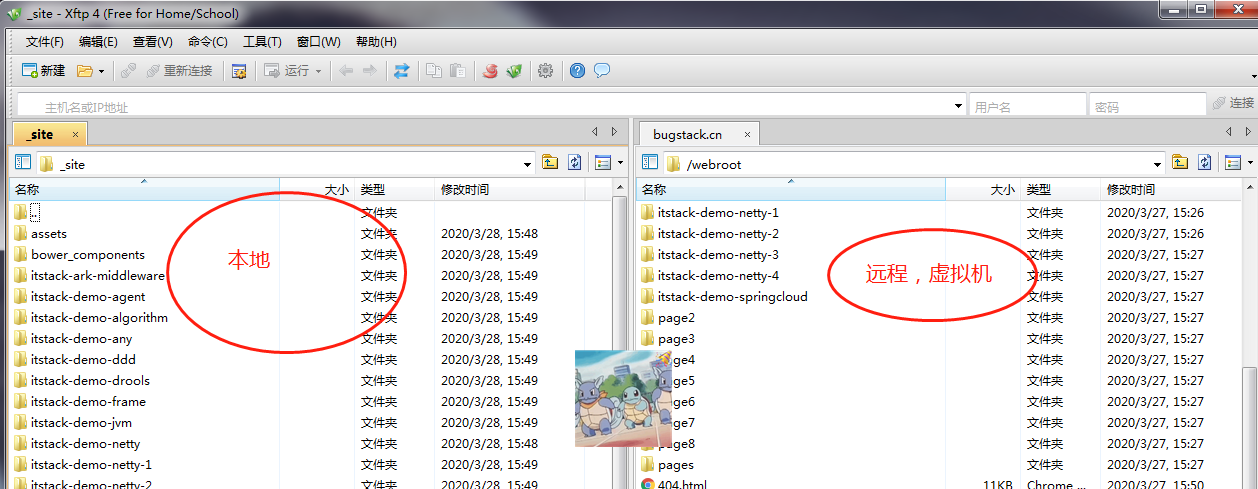
- 部署以后我们在线网站就可以访问了;https://bugstack.cn/ (opens new window)
# 九、自动发布
如果每次都是这样去本地编译在部署到服务端,代码又得维护在 GitHub 还是比较麻烦的。可以使用;Github -> Travis CI -> Docker-> VPS。的方式进行部署,不过还得花点钱买服务器。
- 本地提交博客 Markdown 文件 到 Github 源文件 repository
- Github 触发 Travis CI 执行自动编译
- Travis CI 编译后 push 静态文件到 Github 静态文件 repository
- Travis CI 通知 Docker 重建镜像(预计 5 分钟)
- 服务器休眠 5 分钟后,Travis CI 通知服务器
- 服务器拉取最新镜像,然后停止并删除原容器,用最新镜像重建容器
这种方式目前我还没有钱和时间去折腾,等后面我的博客访问量和内容更大了以后在投入经历去搞!
# 十、助记指令
| 序号 | 指令 | 说明 |
|---|---|---|
| 1 | ruby -v | 查看Ruby版本 |
| 2 | gem update | 更新 |
| 3 | gem -v | 查看Gem版本 |
| 4 | gem install jekyll | 安装jekyll |
| 5 | gem install bundler | 下载bundler |
| 6 | gem install jekyll-paginate | 下载jeky-paginate |
| 7 | git clone git@github.com:xiaofuge/xiaofuge.github.io.git | 克隆主题(cd到xiaofuge.github.io,执行jekyll serve 可以在http://localhost:4000看到效果) |
| 8 | gem sources --add https://gems.ruby-china.com/ --remove https://rubygems.org/ | 更换源https://gems.ruby-china.com (opens new window) |
| 9 | jekyll new myblog | 初始化默认博客 |
| 10 | bundle install | 进入博客文件夹执行初始化 |
| 11 | jekyll build | 本地编译默认所有链接为http://localhost |
| 13 | jekyll build --source <source> --destination <destination> | 编译指定的文件夹,同时可以设定到指定的地方 |
| 12 | jekyll build --destination | 编译到指定地方 |
| 14 | jekyll build --watch | 编译后好自动监听文件变化 自动编译 |
| 15 | bundle exec jekyll build | 您只需构建您的站点(而不是在本地提供),然后您可以将生成的文件上传到您的服务器(这将生成与_config.yml中配置变量url的值的规范链接) |
| 16 | jekyll clean | 清空编译_site |
| 17 | jekyll serve | 本地启动服务 |
| 18 | jekyll serve --host 0.0.0.0 --port 80 | 指定ip和端口启动 |
| 19 | nohup jekyll serve & | 后台运行 |
| 20 | ps -axu | grep jekyll |
| 21 | kill -9 [pid] | 杀死进程 |
# 十一、总结
- 通过这次
GitHub挂了,也彻底让我的博客又得花钱维护了。不花点钱是真不行!以前我忍受了;速度、收录、体验,但是突然的一挂,啥都拜拜了。所以只能挂到自己的服务器上,还好价格也不贵!毕竟是一个只能支持 PHP、ASP的虚拟机。 - 从没有那件事情是可以轻轻松松的,在
天灾人祸来临的时候,能帮你抵挡的都是你日积月累的能力。就像;是时候展示真正的技术了! Jekyll搭建的博客还是蛮好看的,也蛮容易维护的。技术人员还是要有自己的博客,通过不停的折腾从里面不断的获取各个技术点的突破。

京公网安备 11030102010881号
| GPL Licensed | Copyright © 2019 小傅哥,All rights reserved.