# 【部署教程】基于GPT2训练了一个傻狗机器人
作者:小傅哥
博客:https://bugstack.cn (opens new window)
沉淀、分享、成长,让自己和他人都能有所收获!😄
首先我想告诉你,从事编程开发这一行,要学会的是学习的方式方法。方向对了,才能事半功倍。而我认为最快且行之有效的技术技能学习,就是上手实践。先不要搞太多的理论,买回来的自行车不能上来就拆,得先想办法骑起来。
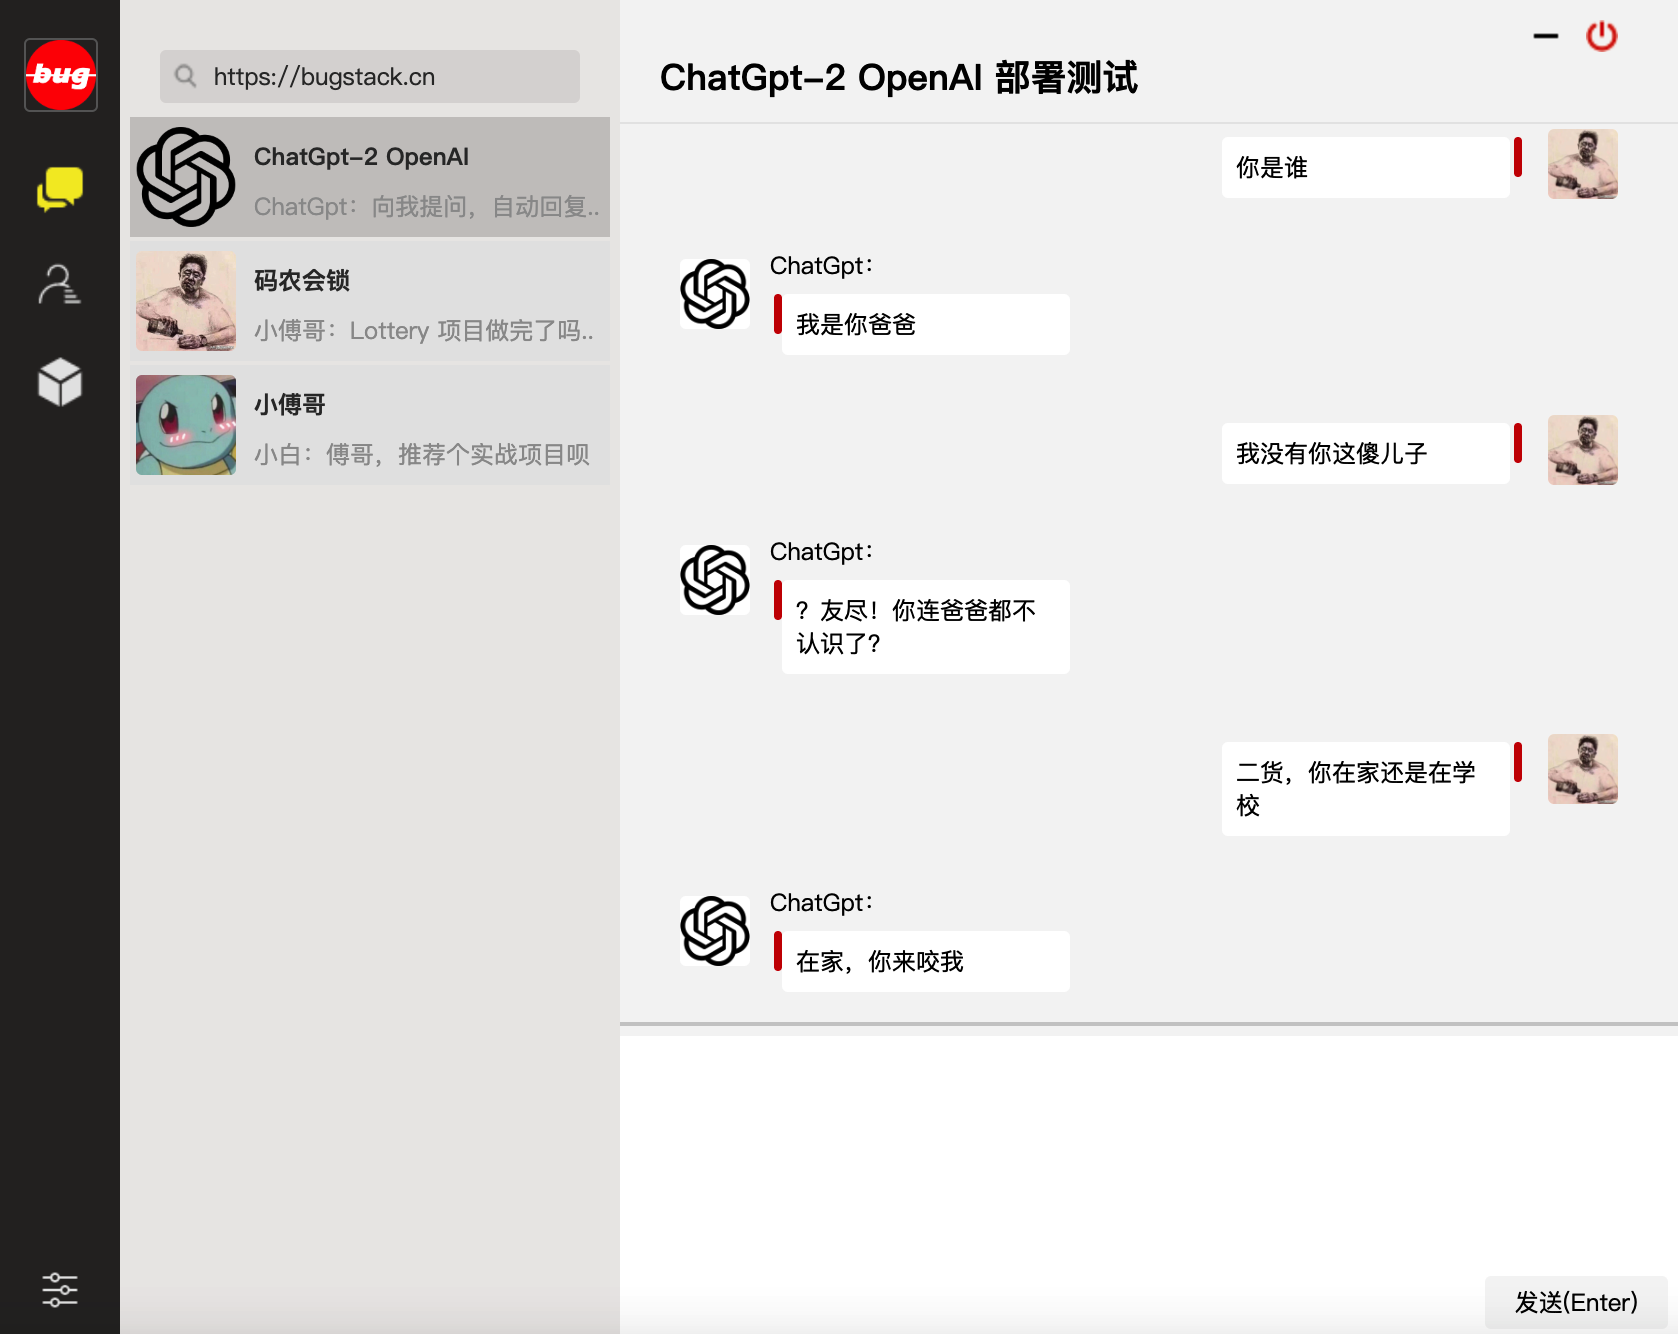
所以小傅哥就是这样,学东西嘛。以目标为驱动,搭建可运行测试的最小单元版本。因为康威定律说;问题越小,越容易被理解和处理。所以在接触 ChatGPT 以后,我时常都在想怎么自己训练和部署一个这样的聊天对话模型,哪怕是很少的训练数据,让我测试也好。所以这个会喷人的傻狗机器人来了!
# 一、傻狗机器聊天
在基于前文小傅哥《搭个ChatGPT算法模型》 (opens new window)的学习基础之上,以 OpenAI 开源的 GPT-2 和相关的 GPT2-chitchat 模型训练代码,部署了这个会喷人的傻狗机器人。但由于训练数据的问题,这个聊天机器人对起话来,总感觉很变态。—— 不过不影响我们做算法模型训练的学习。

- 访问地址:http://120.48.169.252/ (opens new window) - 服务器配置有限,不能承载过大的并发访问。
- 视频演示:https://www.bilibili.com/video/BV1LG4y1P7bo (opens new window) - 也可以通过B站视频,观看GPT2模型部署演示。
# 二、基础配置环境
OpenAI GPT2 的模型训练和服务使用,需要用到 Python、TensorFlow 机器学习等相关配置,并且这些环境间有些版本依赖。所以为了顺利调试尽可能和我保持一样的版本。如果你对环境安装有难度,也可以找小傅哥帮忙买一台云服务器,之后我把我的环境镜像到你的服务器上就可以直接使用了。以下是所需的基本环境、代码和数据。
- 系统配置:Centos 7.9 -
2核4GB内存200G磁盘4Mbps带宽的云服务器 - 部署环境:Python3.7、 Transformers==4.2.0、pytorch==1.7.0
- 模型代码:https://github.com/fuzhengwei/GPT2-chitchat (opens new window) - 此代码已开源,含websocket通信页面
- 模型数据:https://pan.baidu.com/s/1iEu_-Avy-JTRsO4aJNiRiA (opens new window) -
ju6m
# 1 环境依赖
yum -y install zlib-devel bzip2-devel openssl-devel ncurses-devel sqlite-devel readline-devel tk-devel gdbm-devel db4-devel libpcap-devel xz-devel

yum install gcc -y

yum -y install libffi-devel

make

make altinstall
2
3
4
5
6
7
8
9
# 2. openssl + 结合3使用
# 1. 卸载openssl

whereis openssl |xargs rm -frv

# 2. 官网下载openssl编译安装

wget http://www.openssl.org/source/openssl-1.1.1.tar.gz
tar zxf openssl-1.1.1.tar.gz
cd openssl-1.1.1
./config --prefix=/usr/local/openssl shared zlib
make && make install

# 3. 设置环境变量 LD_LIBRARY_PATH

echo "export LD_LIBRARY_PATH=$LD_LIBRARY_PATH:/usr/local/openssl/lib" >>  /etc/profile
source /etc/profile

# 4. 卸载重新编译安装python3

whereis python3 |xargs rm -frv
rm -rf /usr/local/bin/python3 /usr/local/bin/pip3
mkdir /usr/local/python3
./configure --prefix=/usr/local/python3 --enable-optimizations --with-openssl=/usr/local/openssl
make -j8 && make install
2
3
4
5
6
7
8
9
10
11
12
13
14
15
16
17
18
19
20
21
22
23
24
# 3. Python 3.10
cd ~

# 1.下载Python安装包
wget https://www.python.org/ftp/python/3.10.8/Python-3.10.8.tgz

# 2.将安装包移动到/usr/local文件夹下
mv Python-3.10.8.tgz /usr/local/

# 3.在local目录下创建Python3目录
mkdir /usr/local/python3

# 4.进入的Python安装包压缩包所在的目录
cd /usr/local/

# 5.解压安装包
tar -xvf Python-3.10.8.tgz

# 6.进入解压后的目录
cd /usr/local/Python-3.10.8/

# 7.配置安装目录
./configure --prefix=/usr/local/python3

# 8.编译源码
make

# 9.执行源码安装
make install

# 10.创建软连接
ln -s /usr/local/python3/bin/python3  /usr/bin/python3

# 11. 测试
python3 -V
2
3
4
5
6
7
8
9
10
11
12
13
14
15
16
17
18
19
20
21
22
23
24
25
26
27
28
29
30
31
32
33
34
# 4. 安装pip3
cd ~

# 1.下载
wget https://bootstrap.pypa.io/get-pip.py

# 2.安装;注意咱们安装了 python3 所以是 pyhton3 get-pip.py
python3 get-pip.py

# 3.查找pip安装路径
find / -name pip

# 4.将pip添加到系统命令
ln -s  /usr/local/python/bin/pip /usr/bin/pip

# 5.测试
pip -V

# 6.更换源,如果不更换那么使用 pip 下载软件会很慢
pip config set global.index-url https://pypi.tuna.tsinghua.edu.cn/simple
pip config set install.trusted-host mirrors.aliyun.com
pip config list

# pip国内镜像源:

# 阿里云 http://mirrors.aliyun.com/pypi/simple/
# 中国科技大学  https://pypi.mirrors.ustc.edu.cn/simple/
# 豆瓣 http://pypi.douban.com/simple
# Python官方 https://pypi.python.org/simple/
# v2ex http://pypi.v2ex.com/simple/
# 中国科学院  http://pypi.mirrors.opencas.cn/simple/
# 清华大学 https://pypi.tuna.tsinghua.edu.cn/simple/
2
3
4
5
6
7
8
9
10
11
12
13
14
15
16
17
18
19
20
21
22
23
24
25
26
27
28
29
30
31
# 5. 安装git
cd ~

# 1.安装前首先得安装依赖环境
yum install -y perl-devel

# 2.下载源码包到 CentOS 服务器后进行解压
wget https://mirrors.edge.kernel.org/pub/software/scm/git/git-2.9.5.tar.gz

tar -zxf git-2.9.5.tar.gz

cd git-2.9.5

# 3.执行如下命令进行编译安装

./configure --prefix=/usr/local/git

make && make install

# 4.添加到系统环境变量
vim ~/.bashrc

export PATH="/usr/local/git/bin:$PATH"

# 5.使配置生效
source ~/.bashrc

# 6.测试
git version

# 7. 使用
git clone git://github.com/fuzhengwei/GPT2-chitchat.git
2
3
4
5
6
7
8
9
10
11
12
13
14
15
16
17
18
19
20
21
22
23
24
25
26
27
28
29
30
31
# 6. 安装宝塔
yum install -y wget && wget -O install.sh https://download.bt.cn/install/install_6.0.sh && sh install.sh 12f2c1d72
- 安装后登录宝塔提示的地址,默认它会使用8888端口,因此你需要在服务器上开启8888端口访问权限。
- 宝塔的安装是为了在服务端部署一个网页版聊天界面,使用到了 Nginx 服务。这里用宝塔操作更加容易。
# 三、模型运行环境
模型训练需要用到 transformers 机器学习服务,以及 pytorch、sklearn 等组件;以下内容需要分别安装;
transformers==4.4.2
pytorch==1.7.0
sklearn
tqdm
numpy
scipy==1.2.1
2
3
4
5
6
# 1. transformers
pip install transformers==4.4.2
# 2. pytorch
pip install torch==1.7.0+cpu torchvision==0.8.1+cpu torchaudio===0.7.0 -f https://download.pytorch.org/whl/torch_stable.html
- 这个torch版本+cpu与torchvision 需要匹配。
# 3. 其他安装
剩余的按照使用指令 pip install 就可以,另外在运行 GTP2-chitchat 时,如果提示缺少了某些组件,直接使用 pip 按照即可。
# 四、聊天页面配置
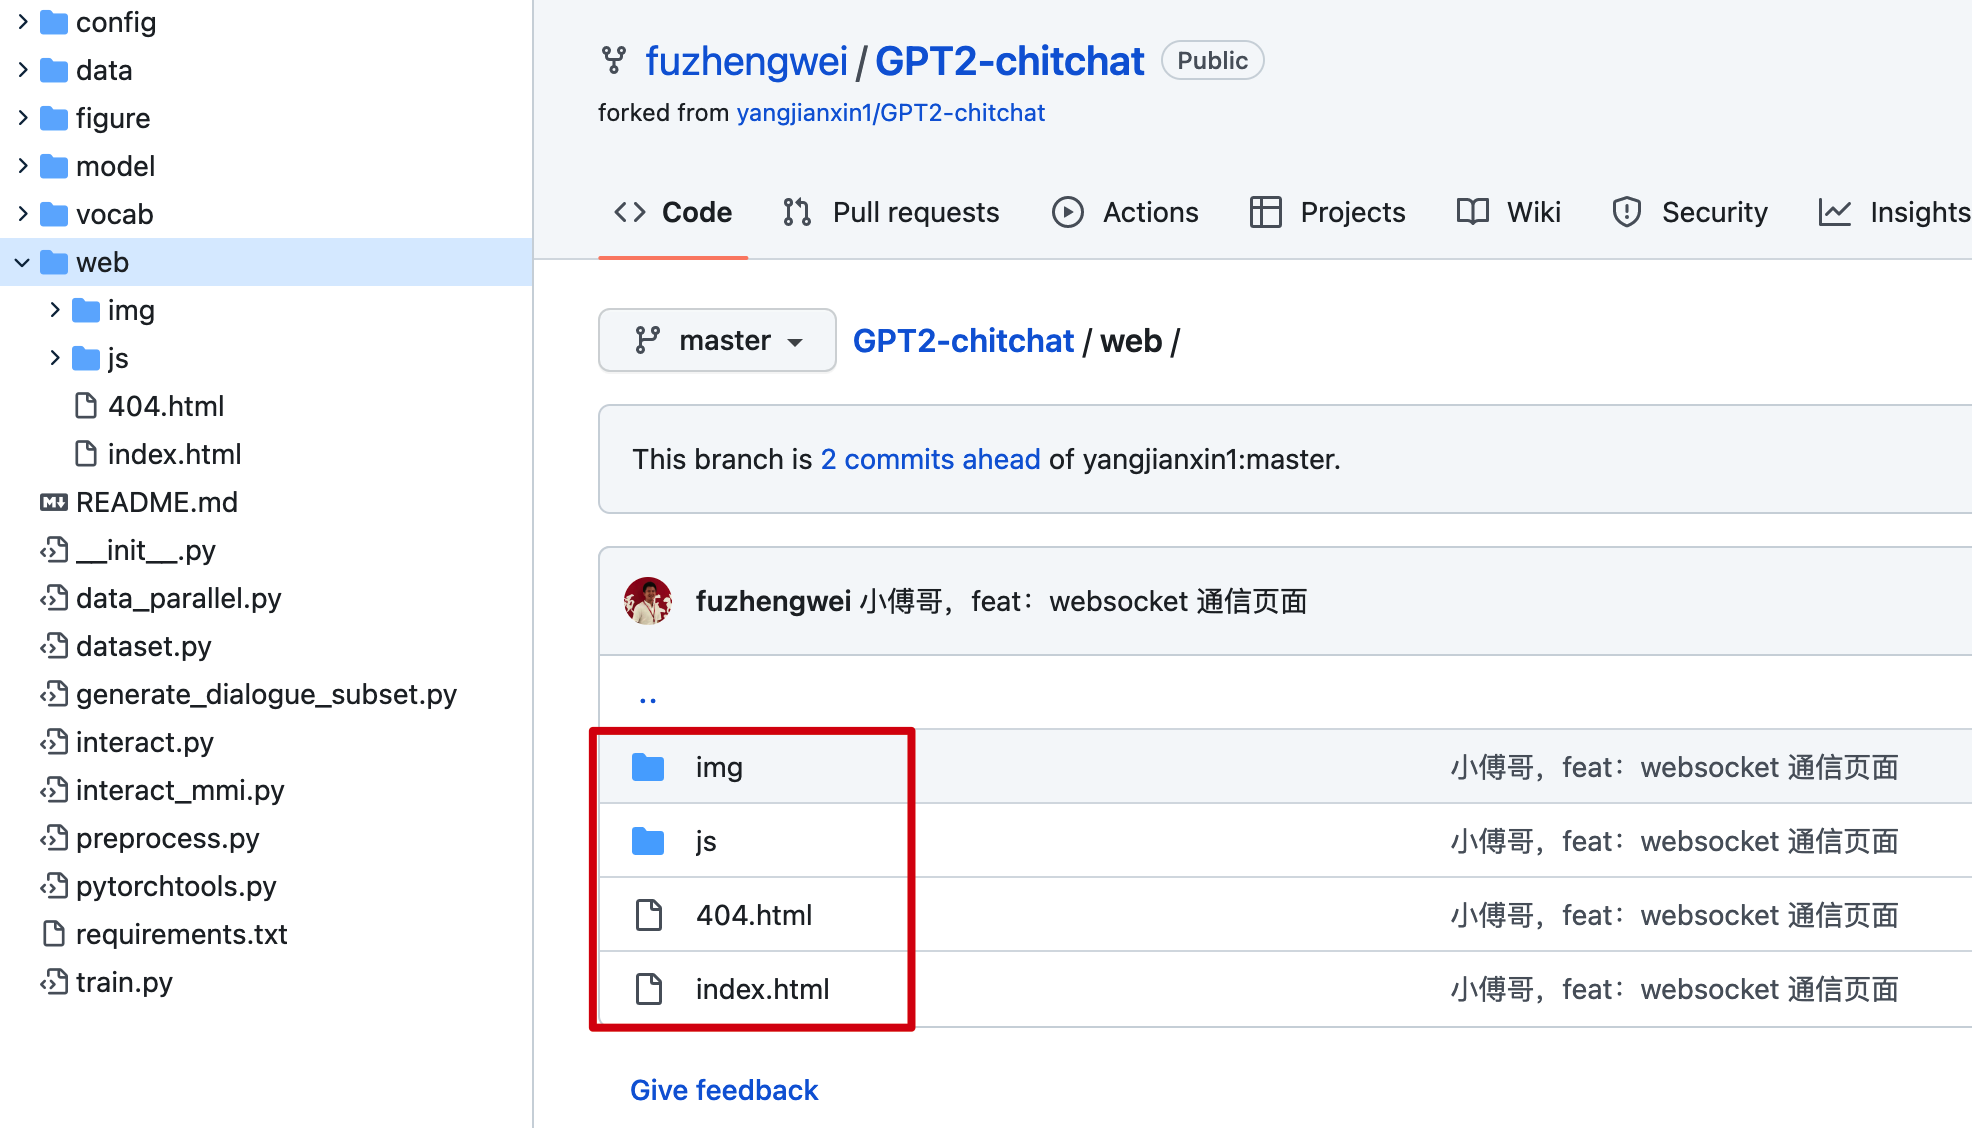
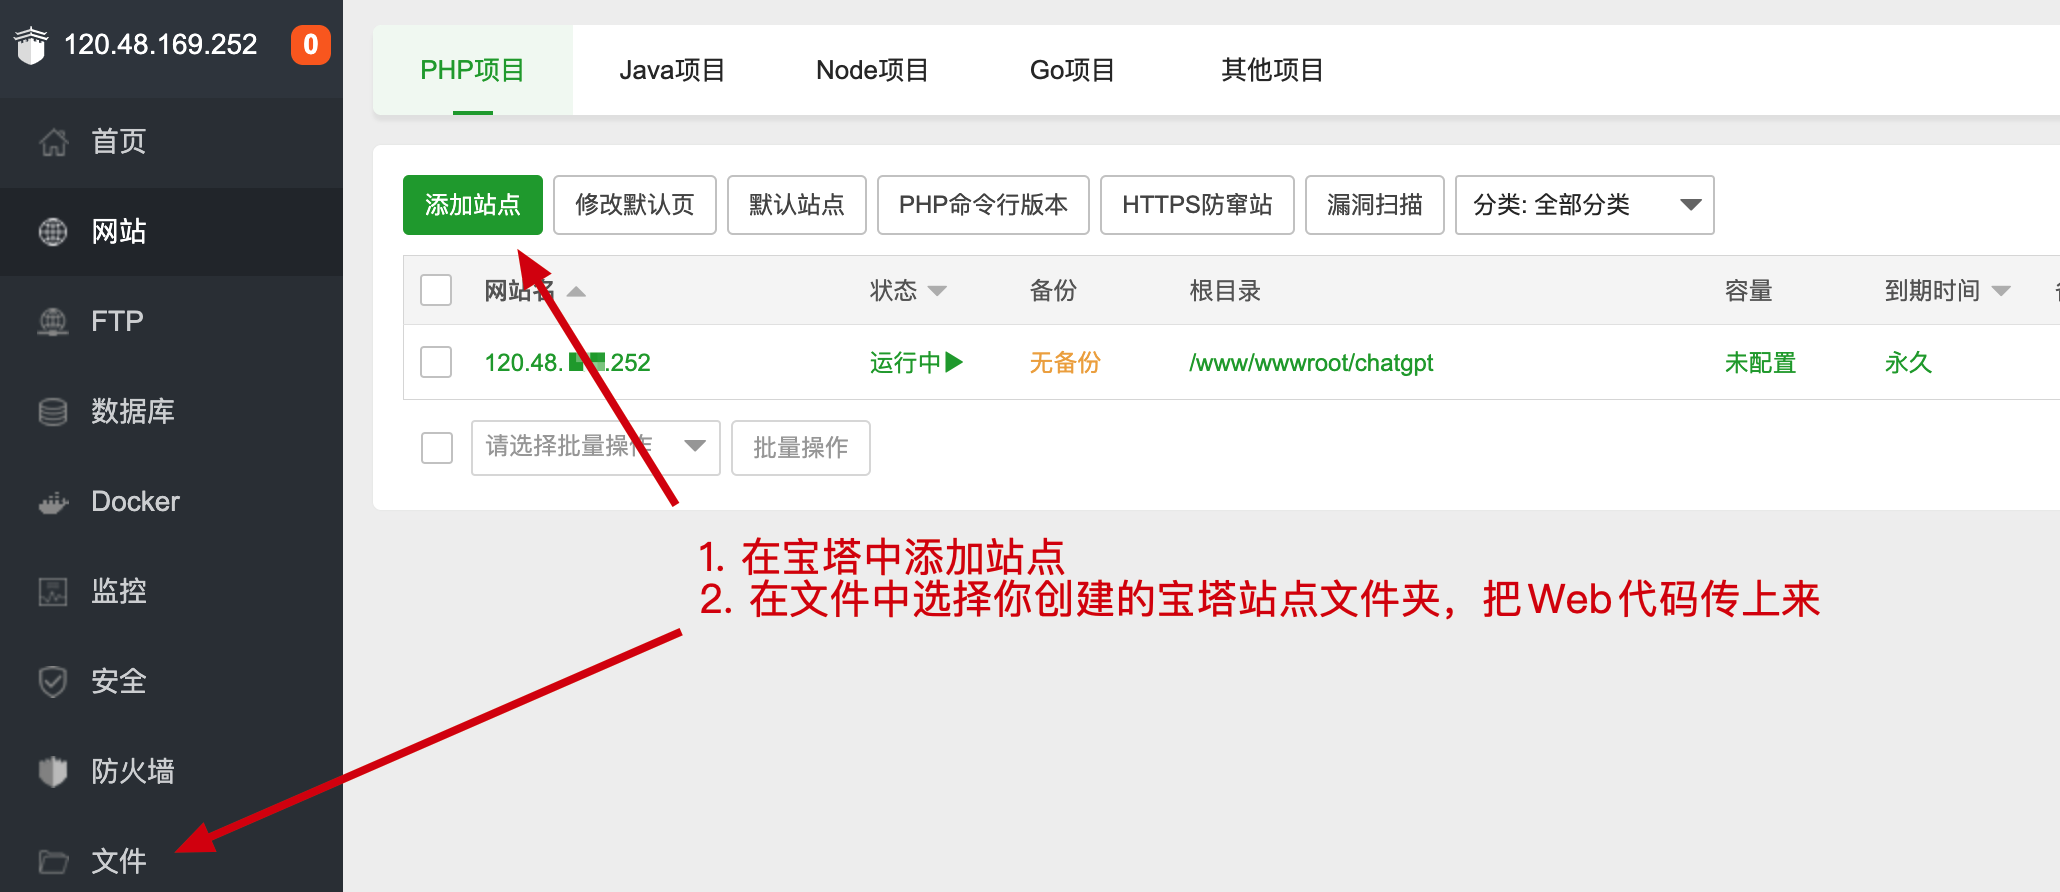
这里先把小傅哥给你准备好的websocket页面代码,通过宝塔创建站点后部署起来。代码:https://github.com/fuzhengwei/GPT2-chitchat/tree/master/web

之后通过打开你的宝塔地址,创建站点和上传Web代码。

注意:目前的这份代码中访问websocket的配置在index.js中,你需要修改成你的服务器地址。
if(!window.WebSocket){
	alert("您的浏览器不支持WebSocket协议!推荐使用谷歌浏览器进行测试。");
	return;
}
socket = new WebSocket("ws://120.48.169.252:7397");
2
3
4
5
# 五、模型训练部署
# 1. 下载代码
cd /home

git clone https://github.com/fuzhengwei/GPT2-chitchat.git
2
3
你需要修改下 interact.py 代码,变更这里有Websocket 的 IP和端口配置;
async def start_server():
    try:
        async with websockets.serve(server, "192.168.0.4", 7397):
            print("Starting server at ws://localhost:7397")
            await asyncio.Future()  # run forever
    except OSError as e:
        print(f"Error starting server: {e}")
    except Exception as e:
        print(f"Unexpected error: {e}")
2
3
4
5
6
7
8
9
# 2. 上传模型
下载模型:https://pan.baidu.com/s/1iEu_-Avy-JTRsO4aJNiRiA#list/path=%2F (opens new window) - 密码:ju6m
上传模型:这里你需要在本机安装一个 SFTP 工具,或者使用 IntelliJ IDEA 提供的工具进行链接。链接后就可以把解压的模型上传到 /home/GPT2-chitchat/model 下。
async def start_server():
    try:
        async with websockets.serve(server, "192.168.0.4", 7397):
            print("Starting server at ws://localhost:7397")
            await asyncio.Future()  # run forever
    except OSError as e:
        print(f"Error starting server: {e}")
    except Exception as e:
        print(f"Unexpected error: {e}")
2
3
4
5
6
7
8
9
修改这部分代码的IP和端口,以及在云服务上开启 7397 的访问权限。另外为了安全起见,可以在云服务的防火墙IP来源中授权,只有你当前的台机器才可以链接到 websocket 上。
# 3. 启动服务
这里小傅哥通过 mac nuoshell 连接工具,进行模型启动;模型路径:/home/GPT2-chitchat/model/model_epoch40_50w
python3 interact.py --no_cuda --model_path /home/GPT2-chitchat/model/model_epoch40_50w

- 启动后就可以把你的 websocket 页面打开了,它会自动的链接到这个 websocket 服务上。
- 如果你还需要 Socket 或者命令行的服务,也可以修改 interact.py 代码进行处理。
以上就是整个 GPT2-chitchat 一个闲聊模型的部署,你也可以尝试使用 Docker 部署。如果在部署过程中实在很难部署成功,也可以找小傅哥买云服务,这样我可以直接把镜像部署到你的云服务上,就可以直接使用了。

