# Frp 内网穿透,用云服务器IP,教你搭一套内网穿透服务!
作者:小傅哥
博客:https://bugstack.cn (opens new window)
沉淀、分享、成长,让自己和他人都能有所收获!😄
大家好,我是技术UP主小傅哥。
作为一个研发人员,我们经常有诉求把本机正在开发阶段的应用,通过本地部署的方式让外部其他人进行访问验证。尤其是一些给远程远程客户演示的时候,也是非常需要这样的服务。但本机并不是公网IP,都是内网的,怎么样外部访问呢?

FRP 内网穿透是什么?
内网穿透是一种技术手段,用于访问位于防火墙或路由器后面的本地网络(内网)中的设备或服务。通常情况下,内网中的设备无法直接通过公网(互联网)进行访问,从而实现隐私保护和安全性。内网穿透技术的目标是突破这一限制,使外部用户能够通过互联网访问内网中的服务或设备。
虽然市面也有一些内网穿透的服务,包括; natapp、coplar、花生壳等,如果你不想折腾,也可以直接使用。但折腾一下,往往会省钱!
# 1. 搭建脚本
这里小傅哥使用了 fatedier/frp 0.60 版本进行搭建,提供了相关的运行脚本。
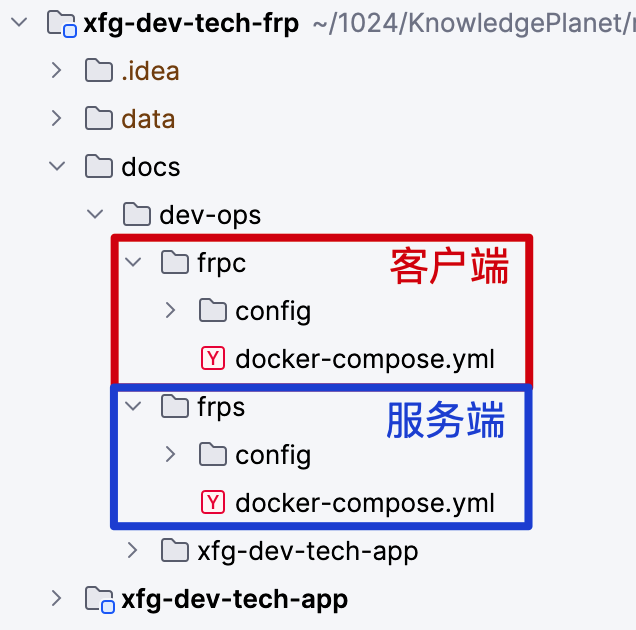
- 地址:https://gitcode.net/KnowledgePlanet/road-map/xfg-dev-tech-frp (opens new window)
- 官网:https://github.com/fatedier/frp (opens new window)
# 1.1 frps - 服务端
# https://github.com/fatedier/frp/blob/dev/conf/frps_full_example.toml
[common]
# 监听端口
bind_port = 7000
# 面板端口
dashboard_port = 7500
# 登录面板的账号密码(修改成自己的)
dashboard_user = admin
dashboard_pwd = admin
# token =
2
3
4
5
6
7
8
9
10
- token 如果设定了,需要保持客户端和服务端一致。
# 命令执行 docker-compose -f docker-compose.yml up -d
version: '3.9'
services:
  frps:
    image: fatedier/frps:v0.60.0
    hostname: frps
    container_name: frps
    volumes:
      - "./config/frps.toml:/frps.toml"
    command:
      - "-c"
      - "/frps.toml"
    network_mode: "host"
2
3
4
5
6
7
8
9
10
11
12
13
- docker compose 按照脚本,走的是
network_mode: "host"不需要额外指定端口。 - 你需要在云服务器开放 7000、7500 以及需要映射出去的端口。比如客户端配置了 8080、9001 也需要在云服务器开放端口,这样才能访问进来。
- 官网配置:https://github.com/fatedier/frp/blob/dev/conf/frps_full_example.toml (opens new window) - 这里有很全的配置可以参考。
# 1.2 frpc - 客户端
# 服务端地址 https://github.com/fatedier/frp/blob/dev/conf/frpc_full_example.toml
serverAddr = "117.72.37.243"
# 服务端配置的bindPort
serverPort = 7000
# token =

[[proxies]]
# 代理应用名称,根据自己需要进行配置
name = "xfg-dev-tech-01"
# 代理类型 有tcp\udp\stcp\p2p
type = "tcp"
# 客户端代理应用IP
localIP = "127.0.0.1"
# 客户端代理应用端口
localPort = 8080
# 服务端反向代理端口;提供给外部访问
remotePort = 8080

[[proxies]]
# 代理应用名称,根据自己需要进行配置
name = "xfg-dev-tech-02"
# 代理类型 有tcp\udp\stcp\p2p
type = "tcp"
# 客户端代理应用IP
localIP = "127.0.0.1"
# 客户端代理应用端口
localPort = 9001
# 服务端反向代理端口;提供给外部访问
remotePort = 9001
2
3
4
5
6
7
8
9
10
11
12
13
14
15
16
17
18
19
20
21
22
23
24
25
26
27
28
29
localPort = 8080是本地应用的端口。remotePort = 8080是远程服务器要暴漏出去的端口,这个端口你可以按需调整。
# 命令执行 docker-compose -f docker-compose.yml up -d
version: '3.9'
services:
  frpc:
    image: fatedier/frpc:v0.60.0
    hostname: frpc
    container_name: frpc
    volumes:
      - "./config/frpc.toml:/frpc.toml"
    command:
      - "-c"
      - "/frpc.toml"
    network_mode: "host"
2
3
4
5
6
7
8
9
10
11
12
13
- docker compose 安装,同样需要指定
network_mode: "host"
# 2. 执行安装
搭建FRP内网穿透需要一台云服务器,其实主要用的就是它的公网IP。不过现在的云服务器都非常便宜,36元就可以购买1年,还能抽取京豆。折算下来也就26元1年了!
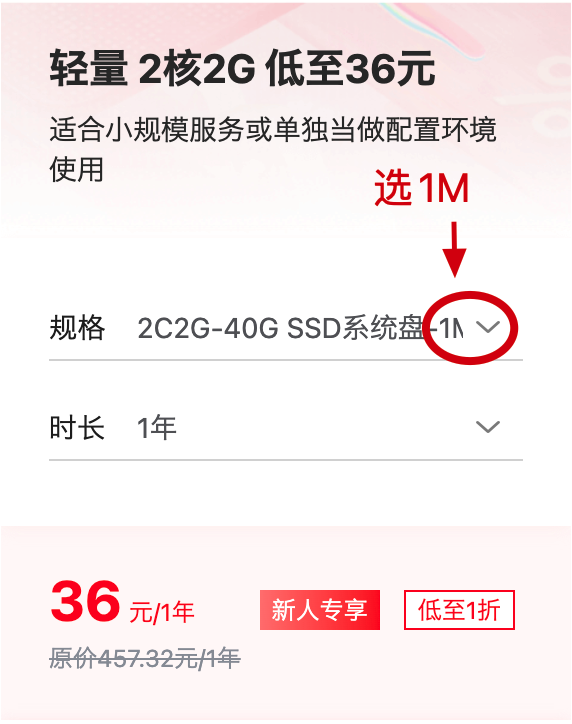
- 专属价:http://618.gaga.plus/ (opens new window)
- 云服务器使用:https://bugstack.cn/md/road-map/docker.html (opens new window) - 已录制了相关 Docker、Portainer 环境安装,你可以直接对照操作。
# 2.1 frps - 云服务器安装
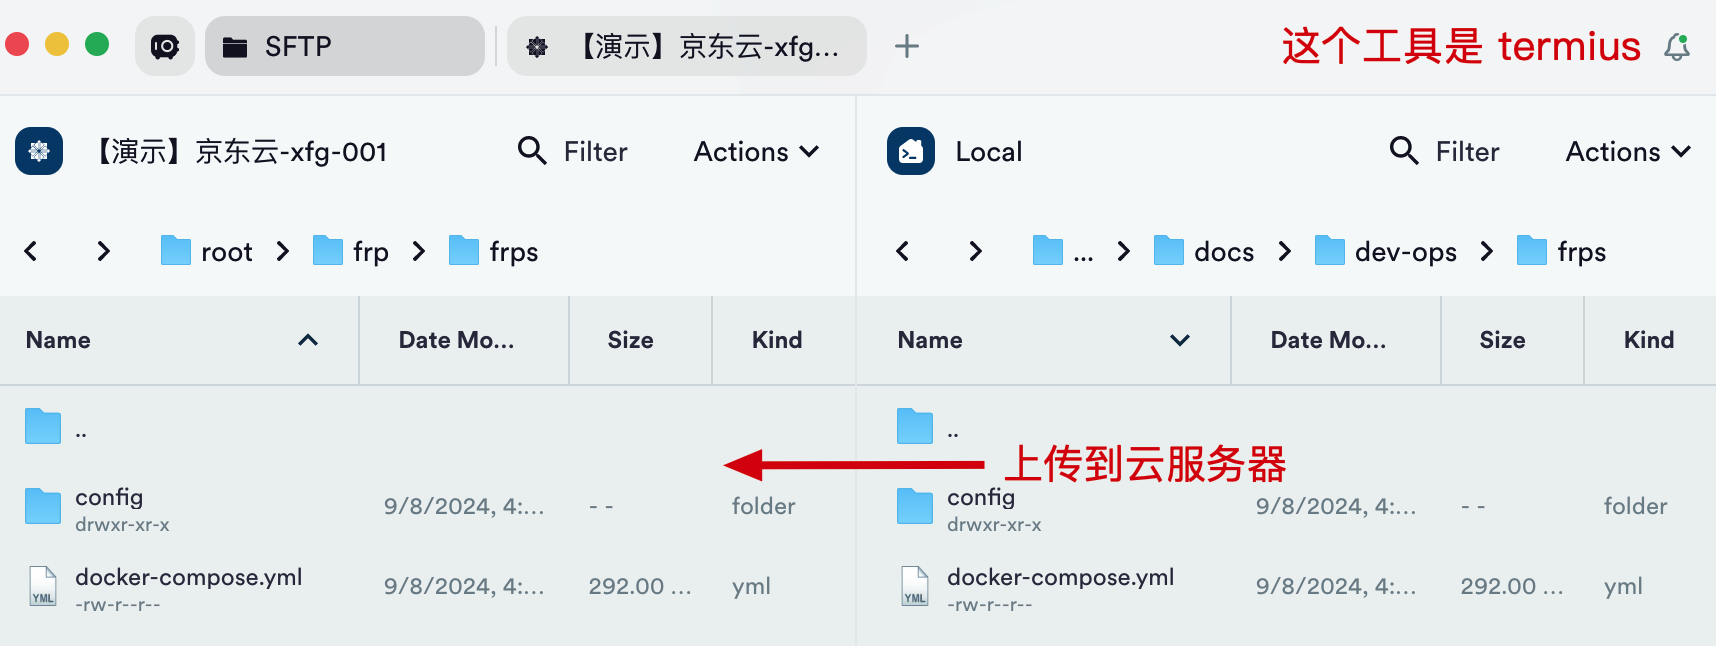
# 2.1.1 上传文件
# 2.1.2 执行脚本
[root@lavm-aqhgp9nber frps]# docker-compose -f docker-compose.yml up -d
[+] Running 1/1
 ✔ Container frps  Started
2
3

你可以进入📃查看启动日志;
WARNING: ini format is deprecated and the support will be removed in the future, please use yaml/json/toml format instead!
2024-09-08 09:51:50.581 [I] [frps/root.go:105] frps uses config file: /frps.toml
2024-09-08 09:51:50.674 [I] [server/service.go:237] frps tcp listen on 0.0.0.0:7000
2024-09-08 09:51:50.674 [I] [frps/root.go:114] frps started successfully
2024-09-08 09:51:50.674 [I] [server/service.go:351] dashboard listen on 0.0.0.0:7500
2024-09-08 09:51:52.429 [I] [server/service.go:576] [cd9f610f66475f3a] client login info: ip [223.72.84.77:10816] version [0.60.0] hostname [] os [linux] arch [amd64]
2024-09-08 09:51:52.447 [I] [proxy/tcp.go:82] [cd9f610f66475f3a] [xfg-dev-tech-02] tcp proxy listen port [9001]
2024-09-08 09:51:52.448 [I] [server/control.go:399] [cd9f610f66475f3a] new proxy [xfg-dev-tech-02] type [tcp] success
2024-09-08 09:51:52.448 [I] [proxy/tcp.go:82] [cd9f610f66475f3a] [xfg-dev-tech-01] tcp proxy listen port [8080]
2024-09-08 09:51:52.448 [I] [server/control.go:399] [cd9f610f66475f3a] new proxy [xfg-dev-tech-01] type [tcp] success
2
3
4
5
6
7
8
9
10
# 2.1.3 开放端口
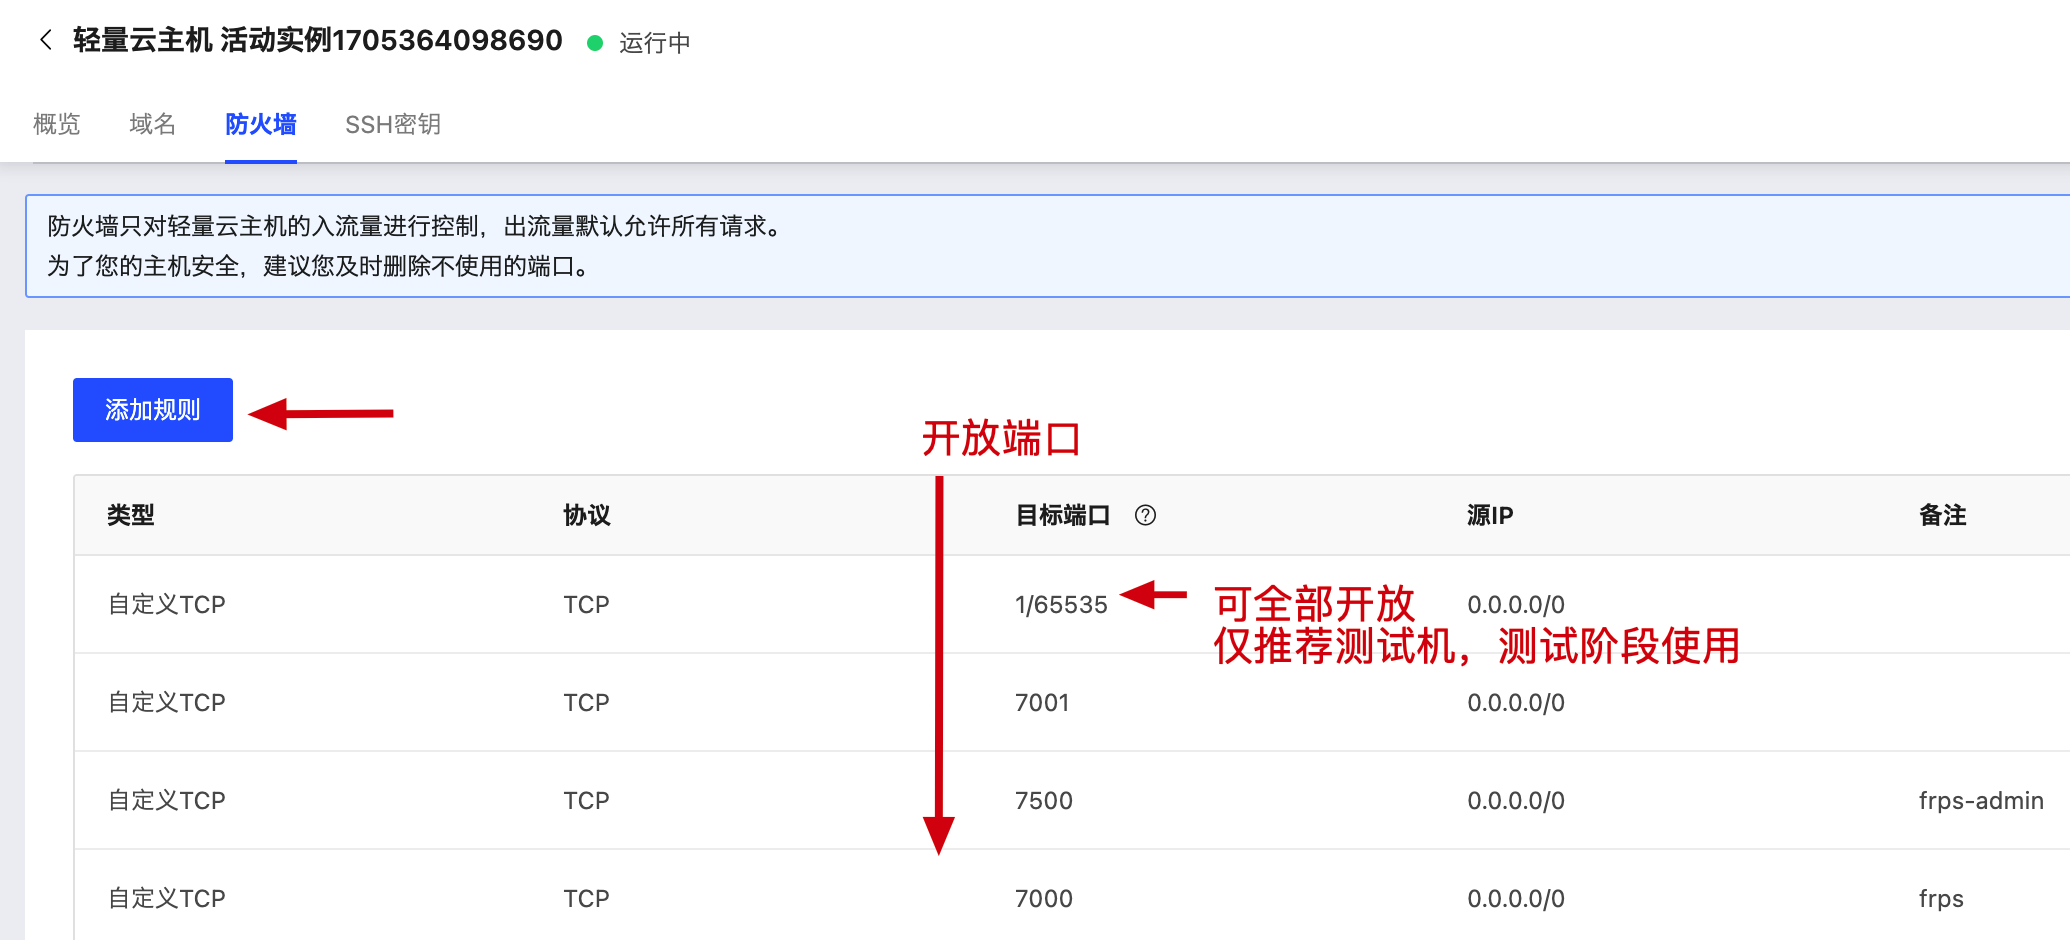
- 进入云服务器防火墙,开放访问端口。
# 2.2 frpc - 本地安装客户端
# 2.2.1 执行脚本
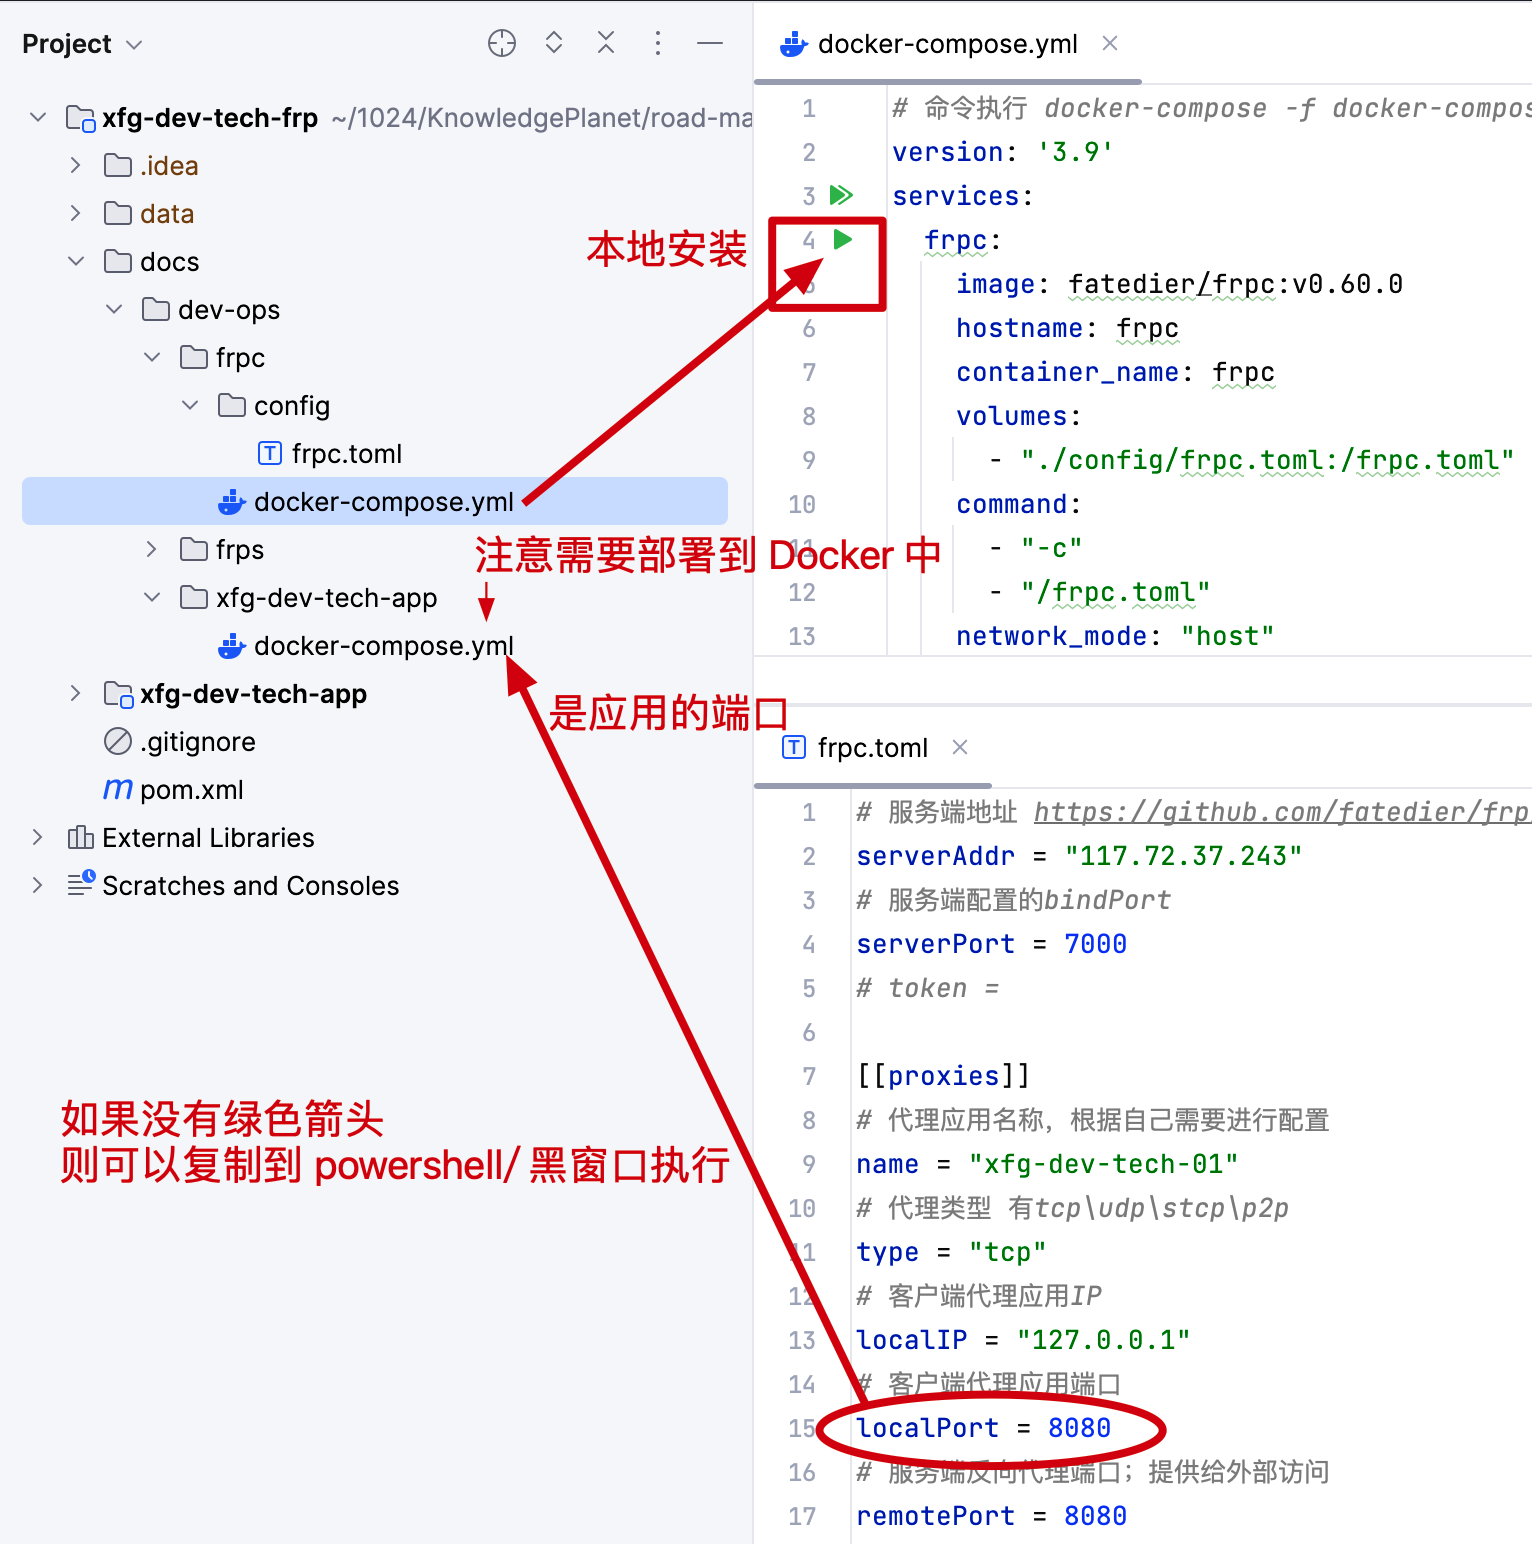
- 注意 frpc.toml 是配置服务器的ip和本机应用的ip信息。你需要修改 serverAddr 的 IP 地址,为你的服务器公网 IP 地址。
- 如果你的 IntelliJ IDEA 带有绿色箭头,且本机也安装了 Docker 那么可以直接安装 frpc 客户端。
# 2.2.2 客户端日志

2024-09-08 10:00:16.472 [I] [sub/root.go:142] start frpc service for config file [/frpc.toml]
2024-09-08 10:00:16.473 [I] [client/service.go:295] try to connect to server...
2024-09-08 10:00:16.533 [I] [client/service.go:287] [adab2679b41d410f] login to server success, get run id [adab2679b41d410f]
2024-09-08 10:00:16.534 [I] [proxy/proxy_manager.go:173] [adab2679b41d410f] proxy added: [xfg-dev-tech-01 xfg-dev-tech-02]
2024-09-08 10:00:16.550 [I] [client/control.go:168] [adab2679b41d410f] [xfg-dev-tech-01] start proxy success
2024-09-08 10:00:16.550 [I] [client/control.go:168] [adab2679b41d410f] [xfg-dev-tech-02] start proxy success
2
3
4
5
6
# 2.2.3 服务端日志


- 客户端启动后,你可以进入到服务端 frps 查看日志,这个时候会注册进来客户端信息。
你还可以进入 frp 管理后台查看
地址:http://117.72.37.243:7500/static/#/ (opens new window) - 修改为你的服务器ip进行访问。
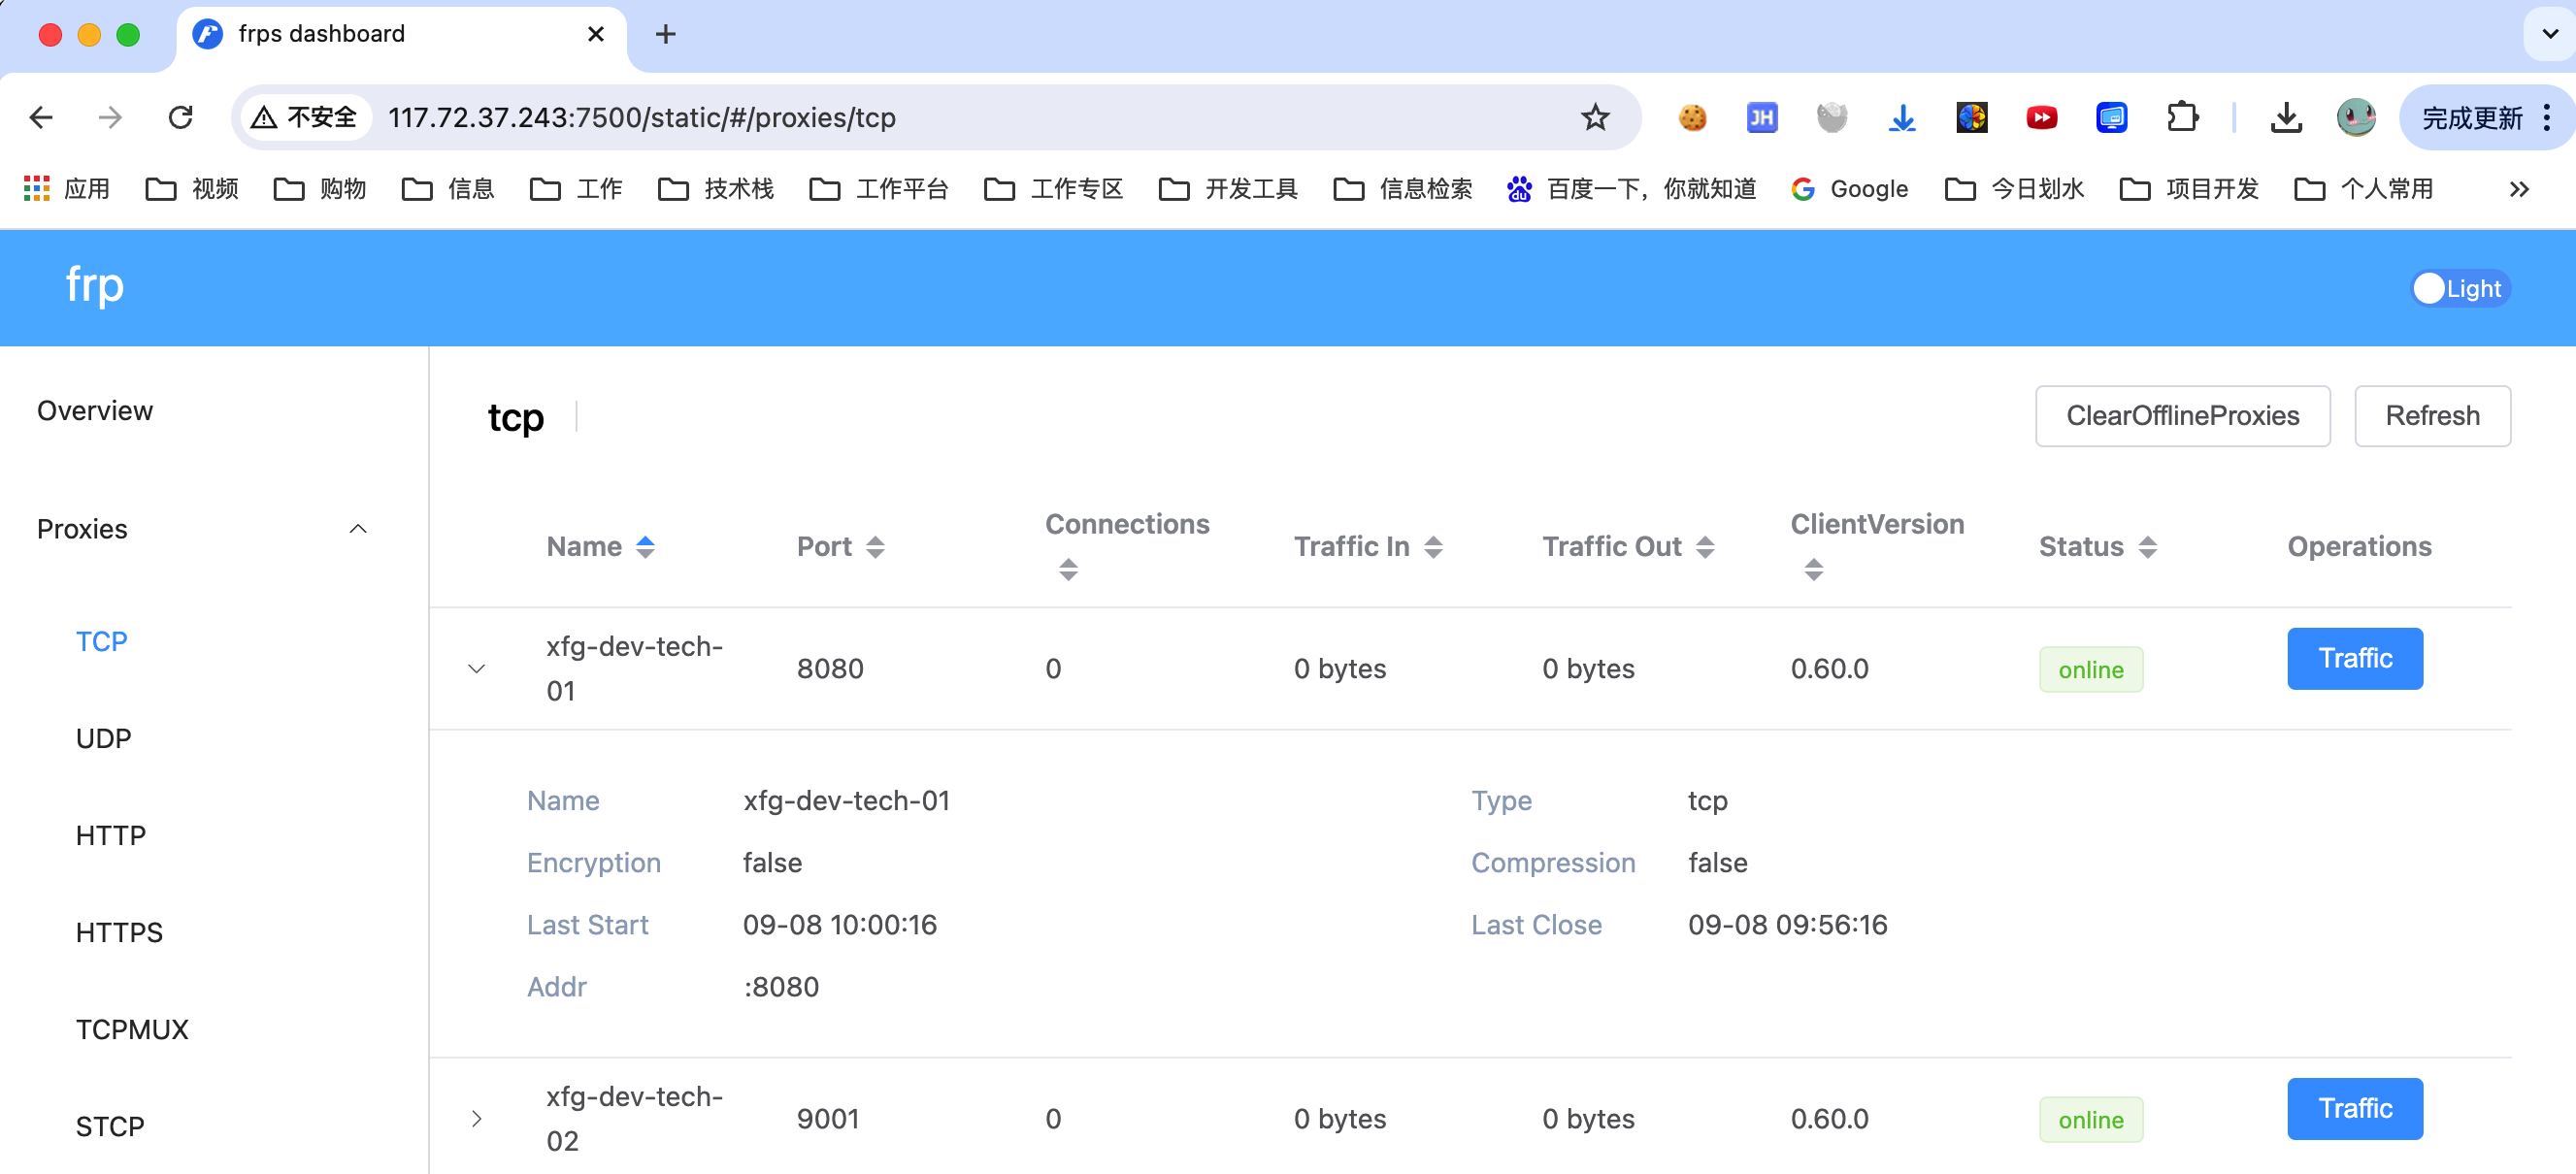
- 这里也可以看到你注册上来的各项信息。
# 3. 测试验证
# 3.1 部署应用
在工程中提供了 xfg-dev-tech-app 的应用,你可以本地执行 docker 脚本进行镜像构建和部署。
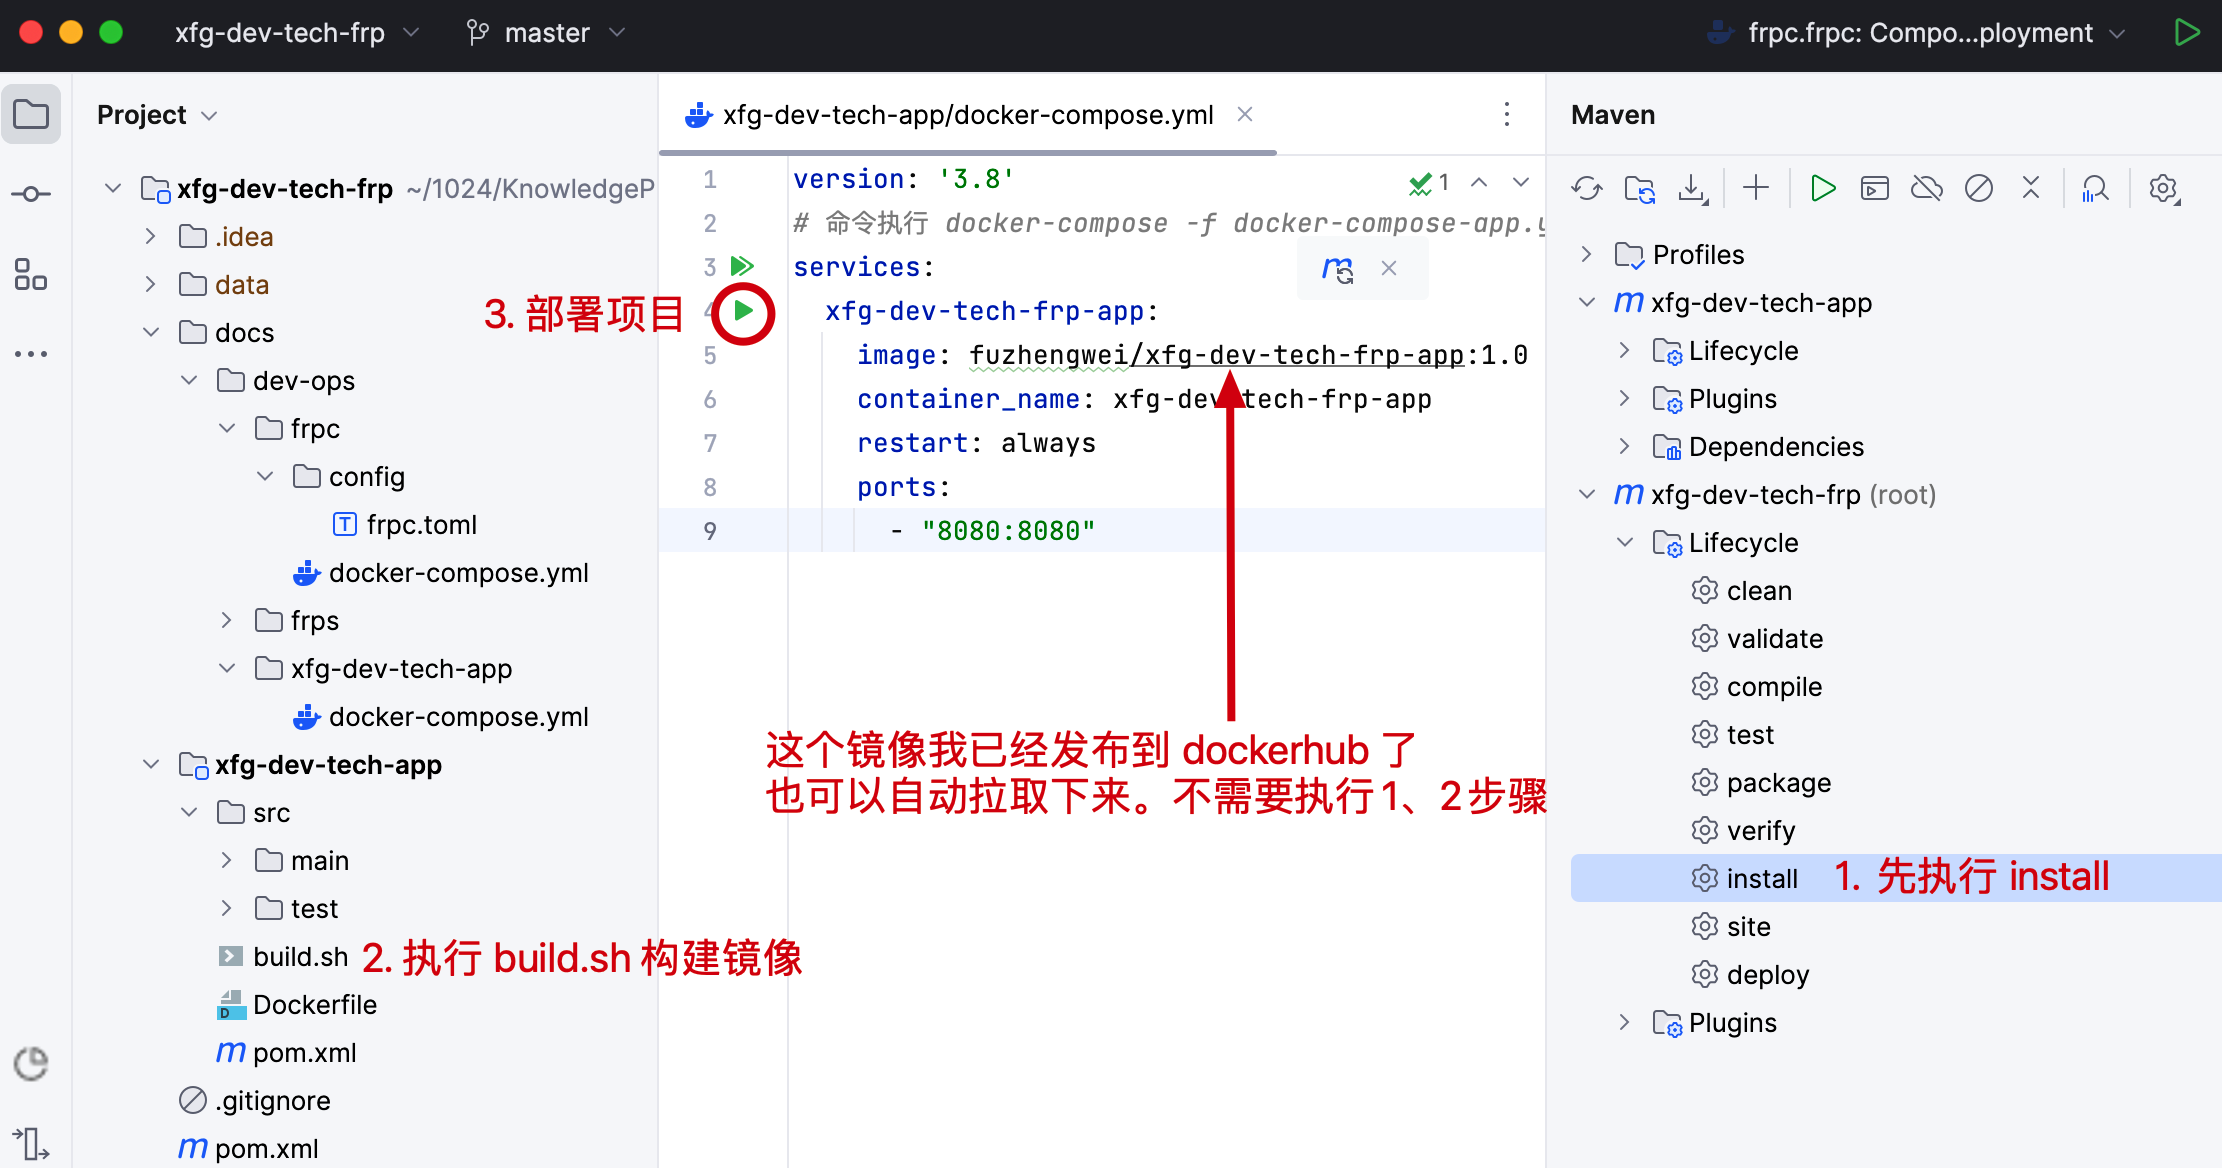

- 如图,执行1、2、3步骤,打包、构建和部署应用。
# 3.2 访问验证
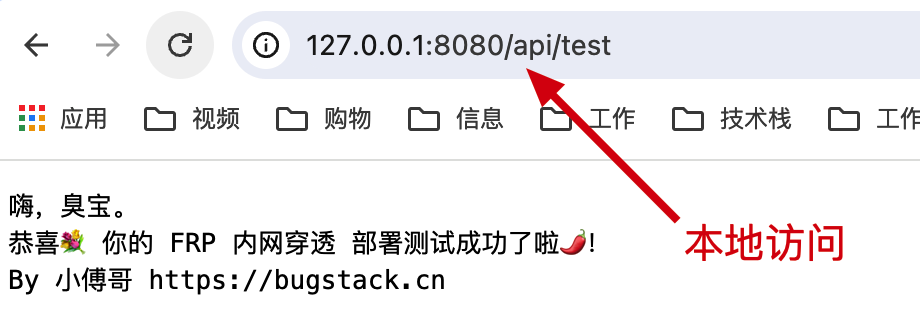
# 3.2.1 本地访问
地址:http://127.0.0.1:8080/api/test (opens new window)
# 3.2.2 穿透访问
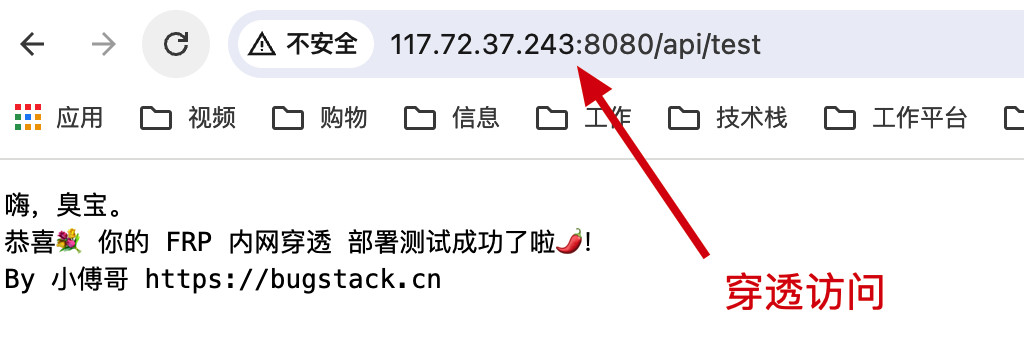
地址:http://117.72.37.243:8080/api/test (opens new window)
# 4. 同类产品
